Pages

July 29, 2014

Summer Garden

PTU CT/Tutorial for Jackies Jewels using her beautiful kit Secret Garden. I love the colors in this kit and there are so many elements to choose from. You can find where to get her kit here on her blog or find it at Pimpin' PSP'ers Warehouse. I used Ismael Rac's Summer Dress tube.


Okay, here we go.

The creation of this tutorial is my own any resemblance to any other tutorial is strictly a coincidence.
Do not copy this tutorial or claim it as your own. If you would like to share it, please share the link to blog ONLY.
This tutorial was written using Adobe Photoshop CS5 and is for those with a working knowledge of Photoshop. This tutorial can be adapted for anyone with a working knowledge of PSP.

Before we start, I would like to remind you to save frequently. This is in case your program closes on you as mine is known to do. J  I save as a .psd file. This keeps your elements in layers instead of merging everything the way a .png file does. I also I do not say copy and paste your element onto your canvas. In photoshop, it is possible to drag and drop. But if you are more comfortable copying and pasting, then by all means do what is easier for you. I also use a white background while I’m making my tag but I delete it when I am finished.

Supplies needed:
Around Secret Garden scrap kit from Jackie’s Jewels. You can find where to buy it here.

The tube I’m using is Ismael Rac’s Summer Dress. You can get it here. Remember, you cannot use any tubes without a license.

Mask: MWD mask 001 made by me. You can get it here.

The font I used was on a disc I bought many years ago. I can’t even remember where I got it. You can use any font you want.

Okay, let’s get started.

Open a canvas 550x550.

Create your mask using paper 11. Place in the center of your canvas or to your liking.

E98: Reduce 91.7%. Place on the left of your canvas slightly midway on your canvas.

E29: Reduce 72.3%. Place on the right side of your canvas towards the top.

E06: Reduce 49.8%. Place in the top left of your canvas.

Duplicate E98 and place in front of the original and slightly lower, to your liking.

E66: Reduce 80.0%. Place in the middle of your canvas towards the top. Add a drop shadow.

E80: Reduce 62.6%. Place on the left side of your canvas towards the top. Add a drop shadow.

E83: Reduce 74.2%. Place in front of E80 to your liking.

E46: Reduce 87.6%. Rotate 7.0. Place in front of E80 to your liking.

E28: Reduce 47.9%. Rotate 42.2. Place on the left side of your canvas in front of the water to your liking. Add a drop shadow.

E89: Place centered at the bottom of your canvas. You’ll need to make the height, 130.5%.

E53: Reduce 35.45. Place to the right of the water, to your liking. Add a drop shadow.

E85: Reduce 54.5%. Place on the left side of your canvas to your liking. Add a drop shadow.

E40: Reduce 45.0%. Place on the left side of the bridge or to your liking. Add a drop shadow. Duplicate and place lower than the original.

E90: Reduce 44.9%. Place in the lower left of the bridge. Add a drop shadow.

E75: Reduce 35.3%. Place next to the bucket to your liking. Add a drop shadow.

E60: Reduce 64.4%. Place on the right side of your canvas to your liking. Add a drop shadow.

E59: Reduce 42.7%. Place in front of your chair, to your liking. Add a drop shadow.

E79: Reduce 31.5%. Place on the right side of your table to your liking. Add a drop shadow.

E70: Reduce 17.7%. Place inside the plate. Erase what is on the edge to make it look as if the element is inside. Add a drop shadow.

E69: Reduce 15.3%. Place in the plate to your liking doing the same with the excess of the element as you did with Element 70. Add a drop shadow.

E72: Reduce 30.2%. Place next to the plate to your liking. Add a drop shadow and outer glow.

E74: Reduce 17.2%. Place in front of the teapot to your liking. Add a drop shadow.

E24: Reduce 42.9%. Place on the right side of your canvas to your liking. Add a drop shadow.

E47: Reduce 30.3%. Place at the top of your canvas, to your liking Add a drop shadow and outer glow.

E09: Reduce 30.7%. Place to the left of the bridge or to your liking. Add a drop shadow.

E58: Reduce 31.2%. Place in the lower left corner of your canvas. Add a drop shadow.

Open your tube. Resize and place to your liking. Add a drop shadow.

Type the name. Color is 841171. Size 57 points.
Open your Blending Options.
Check Drop Shadow using the default settings.
Check Inner Glow using the default settings.
Check Stroke size 32 Color is 53024D. Place the name on the bottom left of your canvas.

Add your license and your watermark. Delete the white background if you used one, save as .png and you are done.


I hope this tutorial was easy to follow. Again, you do not have to follow this step by step. Add your own touch to it.

Pretty Paula

PTU CT/Tutorial for Trinita Lola featuring the beautiful tube Paula which you can find at PicsForDesign. This tube has so many layers to choose from the tag possibilities are endless. I used the gorgeous scrap kit Secret Garden by Jackie's Jewels.


Here's hoping you find this tutorial easy to follow.

The creation of this tutorial is my own any resemblance to any other tutorial is strictly a coincidence.
Do not copy this tutorial or claim it as your own. If you would like to share it, please share the link to blog ONLY.
This tutorial was written using Adobe Photoshop CS5 and is for those with a working knowledge of Photoshop. This tutorial can be adapted for anyone with a working knowledge of PSP.

Before we start, I would like to remind you to save frequently. This is in case your program closes on you as mine is known to do. J  I save as a .psd file. This keeps your elements in layers instead of merging everything the way a .png file does. I also do not say copy and paste your element onto your canvas. In Photoshop, it is possible to drag and drop. But if you are more comfortable copying and pasting, then by all means do what is easier for you. I use a white background while I’m making my tag but I delete it when I am finished.

Supplies needed:

I’m using the adorable tube Paula from Trinita. You can get it here.

I used Rainbow Beach scrap kit by Jackie’s Jewels. You can find where to buy it from her blog here or at Pimpin’ PSPers Warehouse here.

Mask: Mask 13 by Amy & Leahs Gimptastic Tuts. You can find it here.

The font I used is a paid font.You can use any font you want.

Open a canvas 500x500.

Open paper 15 and create your mask. Place on your canvas to your liking. Lower opacity 64%.

E30: Reduce 54.2%. Place midway towards the top of your canvas or to your liking. Add a drop shadow.

E98: Place towards the bottom of your canvas. I have mine off the canvas. Duplicate and place on the right halfway off the canvas. Duplicate again and place at the bottom left of your canvas or to your liking.

E84: Place in the center of your canvas towards the bottom. Open your blending options. Check Drop shadow using the default settings.
Check Bevel and Emboss using default settings.

E37: Place in the middle of the stone path. Add a drop shadow.

E64: Reduce 38.4%. Place in front of the tree to your liking.
E44: Reduce 74.7%. Place on the left side of your canvas towards the top. Open your blending options.
Check Drop shadow using the default settings.
Check Bevel and Emboss using default settings.

E18: Reduce 29.8%. Place on E44 to your liking. Add a drop shadow.

E64: Reduce 60.6%. Place on the upper right side of your canvas.

E43: Reduce 93.8%. Place in the middle of your canvas. Open your blending options. Check Drop shadow using the default settings.
Check Bevel and Emboss using default settings.

E16: Reduce 23.5%. Place in the lower right corner to your liking. Add a drop shadow.

E48: Reduce 34.4%. Place in the bench to your liking.

E22: Reduce 29.9%. Place next to the jug or to your liking. Add a drop shadow.

E35: Rotate 90o clockwise. Flip Vertically. Reduce 45.9%. Rotate –10.9. Place across the top of the bench to your liking. Add a drop shadow. Duplicate. Reduce 76.3%. Place to the right of the original.

E08: Reduce 25.7%. Place in front of the bottle on the lower right side of your canvas or to your liking. Add a drop shadow.

E49: Reduce 29.2%. Place on the bench as if it’s draped over it to your liking. Add a drop shadow.

E62: Reduce 19.8%. Place on the left arm of the bench to your liking. Add a drop shadow.

E10: Reduce 4.9%. Place on the left side of the arch to your liking. Add a drop shadow.

E20: Reduce 11.2%. Place on the leaves hanging from the benches or to your liking. Add a drop shadow.

E11: Reduce 41.6%. Place on the lower left side of your canvas near the bench arm. Add a drop shadow. Duplicate. Reduce 73.1%. Place to the right of the original or to your liking.

E09: Reduce 25.5%. Place over the chain of the key chimes. Add a drop shadow and outer glow.

E100: Reduce 17.8%. Place on the bench to your liking. Add a drop shadow.

E42: Reduce 38.8%. Place towards the lower right corner of your canvas. Add a drop shadow.

E95: Reduce 26.9%. Place in front of E42, to your liking. Add a drop shadow.

E31: Reduce 45.5%. Place near E42 & E95 to your liking. Add a drop shadow.

Open your tube. Reduce to your liking and place it on your canvas. Add a drop shadow.

Type the name. The color settings are C73259.  Size 45 points. After you type in your name, go to your blending options.
Check Drop Shadow:
Blend Mode: Normal
Color: 680EA0
Angle: 120
Distance: 0
Spread: 14
Size: 10
Check Gradient Overlay.
Blend Mode: Normal
Opacity: 100%
Click on the color bar. For the first Color Stop use A00B51.
Second Color Stop EB0672
Third Color Stop A00B51. Click on OK.
Style: Linear
Angle: 90o
Scale: 100%
Check Stroke size 2, color is 262727.
Place the name on the top of your canvas to your liking.

Add your license and your watermark making sure they are legible. Delete the white background. Save as .png and you’re done.


I hope this tutorial was easy to follow. Again, you do not have to follow this step by step. Add your own touch to it. I would love to see your results if you do this tutorial.

July 24, 2014

Oceana

PTU CT tag/tut for Scrappin' Krazy Designs using her beautiful and packed scrap kit Oceana. Visit her blog to see where to buy it.


The creation of this tutorial was created by my own little mind. Any resemblance to any other tutorial is strictly a coincidence.
Do not copy this tutorial or claim it as your own. If you would like to share it, please share the link to my blog ONLY.
This tutorial was written using Adobe Photoshop CS5 and is for those with a working knowledge of Photoshop. This tutorial can be adapted for anyone with a working knowledge of PSP.

Before we start, I would like to remind you to save frequently. This is in case your program closes on you as mine is known to do. J  I save as a .psd file. This keeps your elements in layers instead of merging everything the way a .png file does. I also I do not say copy and paste your element onto your canvas. In Photoshop, it is possible to drag and drop. But if you are more comfortable copying and pasting, then by all means do what is easier for you. I also use a white background while I’m making my tag but I delete it when I am finished.

Supplies needed:
Scrappin’ Krazy Designs, Oceana scrap kit. You can find where to buy it here.

I’m using the very awesome tube Mermaid Girl from Ismael Rac. You can get it here.

Mask used is WMD003. You can find it here.

Font used is Cancun. You can use any font you want though.

Open a canvas 550x550

Create your mask using paper p01. Place at the top of your canvas or to your liking.

E13: Place at the bottom of your canvas.

E50: Reduce 80.1%. Place in the center of your canvas towards the top. Add a drop shadow.

E38: Reduce 86.5%. Place in the middle of the frame or to your liking. Duplicate.

E40: Flip horizontally. Reduce 95.3%. Place towards the bottom of your canvas.

E28: Reduce 57.4%. Place towards the bottom in the middle of your canvas or to your liking. Duplicate and place near the top on the left side of your canvas or to your liking.

E08: Reduce 41.8%. Place in the lower left corner of your canvas. Add a drop shadow.

E45: Reduce 32.5%. Place at the bottom of your canvas, towards the right or to your liking. Add a drop shadow. Duplicate and place in front of E08 to your liking.

E57: Reduce 32.6%. Place in the upper left corner. Add a drop shadow.

E36: Reduce 59.8%. Place on the lower left of your canvas. Duplicate twice. Take the last copy and flip horizontally. Place on the lower right of your canvas, to your liking. Duplicate.
Note:
The purpose of duplicating is to allow the element to show up without the use of a drop shadow. I personally like the way it looks without the drop shadow sometimes. This is just my preference, if you prefer to use a drop shadow, then just delete the duplication steps.

E07: Reduce 20.6%. Place slightly off center to the right of your canvas at the bottom or to your liking. Add a drop shadow.

E24: Reduce 29.4%. Rotate –44.8. Place to the left of the driftwood. Add a drop shadow.

E44: Reduce 2107%. Place at the top of the frame. Add a drop shadow.

E16: Reduce 25.6%. Place on the left side of your canvas to your liking. Add a drop shadow. Duplicate and place on the right side of your canvas near the wave or to your liking.

E43: Reduce 18.9%. Place between the anchor and driftwood. Add a drop shadow.

E19: Reduce 19.2%. Place in the lower right corner of your canvas. Add a drop shadow.

Open your tube, resize and place to your liking. Add a drop shadow.

E10: Reduce 15.2%. Place in front of the anchor to your liking. Add a drop shadow.

E21: Flip horizontally. Reduce 24.7%. Place in the lower right corner or to your liking.

E17: Reduce 45.0%. Place to the right of the jellyfish to your liking. Add a drop shadow.

E42: Reduce 23.7%. Place near element E17. Add a drop shadow.

E03: Reduce 26.1%. Place near the seahorse to your liking. Add a drop shadow.

E33: Reduce 16.2%. Place in the lower left corner. Add a drop shadow.

E34: Reduce 17.3%. Place in front of the driftwood. Add a drop shadow.

E04: Reduce 38.1%. Place in the lower right corner of your canvas or to your liking. Add a drop shadow.

Type the name. The color settings are 72CDD7.  Size 77 points. After you type in your name, go to your blending options.
Check Drop Shadow using the default settings.
Check Bevel and Emboss using the default settings.
Check Stroke size 3, color is 870992. Place the name on the top left of your canvas.

Add your license and your watermark.

Delete the white background. Save as .png.


I hope this tutorial was easy to follow. Again, you do not have to follow this step by step. Add your own touch to it and I would love to see the results if you try my tut.

July 9, 2014

Joseph's World...

PTU CT/tutorial for Mystical Scraps Store.  I used Whispy's D'zines scrap kit Joseph's World. You can find it here.
It's perfect for those tags for Fathers Day, husband or son's birthday.

The creation of this tutorial is my own any resemblance to any other tutorial is strictly a coincidence.
Do not copy this tutorial or claim it as your own. If you would like to share it, please share the link to blog ONLY.
This tutorial was written using Adobe Photoshop CS5 and is for those with a working knowledge of Photoshop. This tutorial can be adapted for anyone with a working knowledge of PSP.

Before we start, I would like to remind you to save frequently. This is in case your program closes on you as mine is known to do. J  I save as a .psd file. This keeps your elements in layers instead of merging everything the way a .png file does. I also I do not say copy and paste your element onto your canvas. In Photoshop, it is possible to drag and drop. But if you are more comfortable copying and pasting, then by all means do what is easier for you. I also use a white background while I’m making my tag but I delete it when I am finished.

Supplies needed:
Joseph’s World scrap kit from Whispy's D'zines. You can find where to buy it here.

I’m using the tube Cowboy from Zlata Ma. It’s an exclusive tube from The PSP Projects Vault. You can get it here.

Mask: Design By Vabys Grungy Misfit Mask 4, you can find it here on the Creative Misfits Blog. Please leave some love if you download.

Font used is MLB Tuscan. You can use any font you want though.

Open a canvas 550x550

Create your mask using Paper 2. Place to your liking on your canvas. Lower opacity to 64%.

E12: Reduce 65.6%. Rotate –12.5. Place in the center of your canvas.

E2: Reduce 75.2%. Rotate –11.8. Place in the center of your canvas. Add a drop shadow.

Paper 14: Reduce it to fit on the inside of your frame or to your liking. Lower opacity to 78%.

Open your tube. If you have a close up of the face, use that. Fit it into the inside of the frame to your liking. Once you have that done, make sure the frame layer is active. Using your magic wand, click inside the frame. Go to Select, click on Modify then Expand. In the Expand Selections box, type in 10, then click okay.
Go to Select again and click on Inverse. Now activate your tube layer. Hit delete. You may want to crop your entire canvas since this only deletes what you can see on the canvas. Once you have that done. Reduce the opacity of the face to 65%.

E36: Reduce 42.2%. Rotate –88.8. Place on the left side of the frame. Add a drop shadow.

E28: Reduce 38.9%. Place on the lower right side of your canvas.

E18: Reduce 35.4%. Place on the lower left side of your canvas. Add a drop shadow.

E19: Flip horizontally. Reduce 58.9%. Rotate 37.6. Place on the right of your frame to your liking. Add a drop shadow.

E35: Reduce 13.0%. Rotate 13.3. Place in the upper left corner of your canvas or to your liking. Duplicate.

E20: Reduce 28.8%. Place in the lower left of your canvas. Add a drop shadow.

E13: Reduce 39.4%. Rotate –70.1.  Place at the top of your frame to your liking. Add a drop shadow. Duplicate and place at the bottom of your frame.

E15: Reduce 91.7%. Place at the top left corner of your canvas.

E16: Reduce 80.1%. Rotate 19.0. Place in the upper left corner of your canvas.

E6: Reduce 37.5%. Place in the right top corner of your frame. Add a drop shadow.

E21: Reduce 37.5%. Place right side of your canvas under the handprint. Add a drop shadow.

E9: Reduce 27.4%. Place on the left side of your canvas to your liking. Add a drop shadow.

E31: Reduce 35.6%. Place in the top corner of the frame Add a drop shadow.

Open your tube, reduce and place to your liking. Add a drop shadow.

Type the name. The color settings are 75A9A2.  Size 66 points. After you type in your name, go to your blending options.
Check Drop Shadow, Bevel & Emboss using the default settings.
Check Stroke size 2, color is 2C586C.
Highlight your name then click the Warp Text button.
Choose Rise
Bend: +30. Click ok.
Place the name on the top left of your canvas.

Add your license and your watermark.

Delete the white background. Save as .png.


I hope this tutorial was easy to follow. Again, you do not have to follow this step by step. Add your own touch to it.

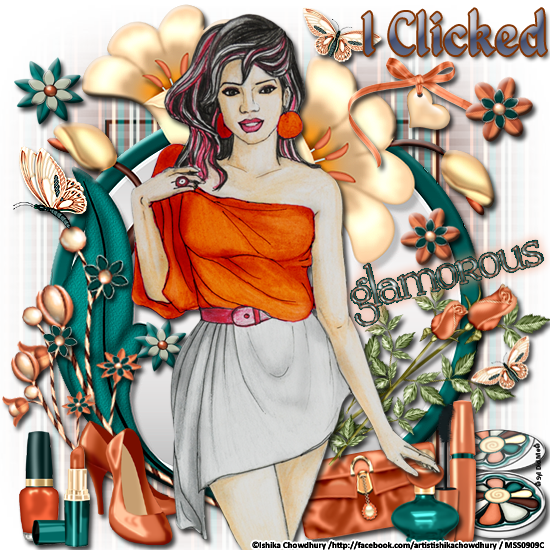
Glamorous Linda

PTU CT tag for Ishika Chowdhury. I used her beautiful tube Linda. She has so many different layers to work with. You can find her tubes at Mystical Scraps.


Here are some snags for you.


July 7, 2014

Forest Faes

 PTU CT/Tutorial for Shining Star Art. I used the lovely Faerie1 posers. Check out her blog to see more of her beautiful work and for information on where to buy them.


The creation of this tutorial is my own any resemblance to any other tutorial is strictly a coincidence.
Do not copy this tutorial or claim it as your own. If you would like to share it, please share the link to blog ONLY.
This tutorial was written using Adobe Photoshop CS5 and is for those with a working knowledge of Photoshop. This tutorial can be adapted for anyone with a working knowledge of PSP.

Before we start, I would like to remind you to save frequently. This is in case your program closes on you as mine is known to do. J  I save as a .psd file. This keeps your elements in layers instead of merging everything the way a .png file does. I also I do not say copy and paste your element onto your canvas. In Photoshop, it is possible to drag and drop. But if you are more comfortable copying and pasting, then by all means do what is easier for you. I also use a white background while I’m making my tag but I delete it when I am finished.

Supplies needed:
Faerie 1 by Shining Star Art. You can find where to buy it here.

Scrap kit used is PTU Natural World of Fantasy by Disyas Digital Designs.

Mask used is Fairy Gem’s Squares and Circles. You can find it here.

Font used is Janagrace. It’s a paid font but you can use any font you want.

Open a canvas 550x550

Create your mask using paper 5. Place to your liking.

E10: Reduce 57.7%. Place slightly off the right center, midway towards the middle vertically. Duplicate and place to the left and slightly higher than the original copy.

E5: Reduce 45.2%. Place on the left of your canvas, almost to the middle of the canvas. Add a drop shadow.

E17: Reduce 94.5%. Place to your liking below the well.

E11: Reduce 92.3%. Place in front of E17 or to your liking.

E1: Reduce 87.1%. Place in the center of your canvas with the tree almost touching the top. Add a drop shadow.

E28: Reduce 60.5%. Place over the well, to your liking. Add a drop shadow.

E19: Place at the bottom of your canvas to your liking. No reduction of this element is needed unless you want to.

E14: Reduce 54.8%. Place on the left side of your canvas in front of the well. Add a drop shadow.

E34: Reduce 20.2%. Place on top of E14 to your liking. Add a drop shadow. Duplicate. Flip horizontally. Reduce 74.7%. Place to the right of E14 or to your liking.

Duplicate E11: Place it at the bottom of your canvas.

E30: Reduce 35.1%. Place towards the top of your canvas on the right or to your liking. Add a drop shadow.

E35: Reduce 19.6%. Place at the bottom left of your canvas. Add a drop shadow.

E48: Reduce 57.6%. Place on the right side of your canvas to your liking. Add a drop shadow. Duplicate, flip horizontally and place to the right slightly lower than the original copy.

E8: Reduce 65.0%. Place on the lower right of your canvas or to your liking. Add a drop shadow.

E9: Reduce 10.3%. Place in front of the tree stump to your liking. Add a drop shadow.

E23: Reduce 64.8%. Place on the top left of your canvas to your liking.

E80: Reduce 18.5%. Rotate –10.5. Place to the right of the chain. Add a drop shadow.

E62: Flip horizontally. Reduce 20.2%. Place on the left side of your canvas to your liking.

E61: Reduce 23.1%. Place over the tree stump to your liking. Duplicate and reduce 78.1%. Place near the top of the tree to your liking.

Now it’s time to add your tube. I used 2 of the faeries that I thought went well with the tag. Open and resize. Place on the canvas to your liking. Add a drop shadow and an outer glow.

Type the name. The color settings are 36FE15.  Size 66 points. After you type in your name, go to your blending options.
Check Drop Shadow, Outer Glow & Bevel and Emboss using the default settings.
Check Stroke size 2, color is 031E01. Place the name on the top left of your canvas.

Add your license and your watermark.

Delete the white background. Save as .png.

I hope this tutorial was easy to follow. Again, you do not have to follow this step by step. Add your own touch to it.

July 2, 2014

Pirates Ahoy!

PTU CT tutorial using the Scrappin’ Krazy Designs kit Pirates Ahoy. Check out her blog to find out where you can buy her kit.

Tube used is Individual Tube 62-1 from Ed Mironiuk. It's available at CDO here.


The creation of this tutorial is my own any resemblance to any other tutorial is strictly a coincidence.
Do not copy this tutorial or claim it as your own. If you would like to share it, please share the link to blog ONLY.
This tutorial was written using Adobe Photoshop CS5 and is for those with a working knowledge of Photoshop. This tutorial can be adapted for anyone with a working knowledge of PSP.

Before we start, I would like to remind you to save frequently. This is in case your program closes on you as mine is known to do. J  I save as a .psd file. This keeps your elements in layers instead of merging everything the way a .png file does. I also I do not say copy and paste your element onto your canvas. In Photoshop, it is possible to drag and drop. But if you are more comfortable copying and pasting, then by all means do what is easier for you. I also use a white background while I’m making my tag but I delete it when I am finished.

Supplies needed:
Scrappin’ Krazy Designs, Pirates Ahoy scrap kit. You can find where to buy it here.

I’m using the very awesome tube Ed Mironiuk Individual Tube 62-1. You can get it here.

Mask used is WMD003. You can find it here.

Font used is Cancun. You can use any font you want though.

Open a canvas 550x550

Create your mask using paper p01. Place at the top of your canvas or to your liking.

E39: Center near the bottom of your canvas. It will be off the canvas.

E40: Reduce 77.0%. Center and place near the top of your canvas. Add a drop shadow.

E98: Place at the top of the sand. Move layer behind the frame.

E77: Reduce 47.8%. Place on top of the wave with the front part of the ship on the frame. Add a drop shadow.

Duplicate the wave and bring the layer over the ship. Flip horizontally. Reduce to these dimensions. Width: 100%. Horizontal: 49.5% Erase the extra that’s on the frame.

E92: Reduce 20.5%. Place on the lower left of your frame, to your liking. Add a drop shadow.

E64: Reduce 75.3%. Place on the top right of the frame. Add a drop shadow.

E39: Place at the bottom of your canvas to your liking.

E26: Reduce 43.8%. Place under your flag on the right side of your canvas.

E45: Reduce 55.4%. Place in the center of your canvas at the bottom. Add a drop shadow. Once you place your tube, you can adjust its position to your liking.

E08: Reduce 49.5%. Place on the right side of the chest or to your liking. Add a drop shadow.

E60: Reduce 36.1%. Place on the side of the chest to your liking. Add a drop shadow.

E12: Reduce 40.2%. Place in front of the chest at the bottom of the canvas. Add a drop shadow.

E37: Reduce 31.5%. Place at the top of your frame to your liking. Add a drop shadow.

E74: Reduce 82.7%. Rotate 6.3. Place on the left side of your frame, to your liking. Add a drop shadow.

E71: Reduce 33.2%. Place in front of the map slightly lower or to your liking. Add a drop shadow.

E79: Reduce 45.2%. Place to the left of the chest to your liking. Add a drop shadow and an outer glow.

E69: Reduce 28.9%. Place in the lower right of your canvas. Add a drop shadow.

E91: Reduce 22.7%. Place in the lower left corner of your canvas. Add a drop shadow.

Open your tube. Resize and place on the canvas to your liking. Add a drop shadow and an outer glow.

Type the name. The color settings are AE3921.  Size 48 points. After you type in your name, go to your blending options.
Check Drop Shadow using the default settings.
Check Bevel and Emboss using the default settings.
Check Stroke size 1, color is 090A0A. Place the name on the top left of your canvas.

Add your license and your watermark.

Delete the white background. Save as .png.


I hope this tutorial was easy to follow. Again, you do not have to follow this step by step. Add your own touch to it.

Lost in Wonderland

 CT tag for Mystical Scraps using the wickedly awesome scrap kit Lost In Wonderland by Black Widow Creationz. You can find where to get it here.

Tube used is Jasmine Becket-Griffith's Individual Tube 134-1. You can find her here. Remember, you cannot use any tube without a license.