November 17, 2018
Autumn Leaves Mask
March 15, 2017
September 29, 2015
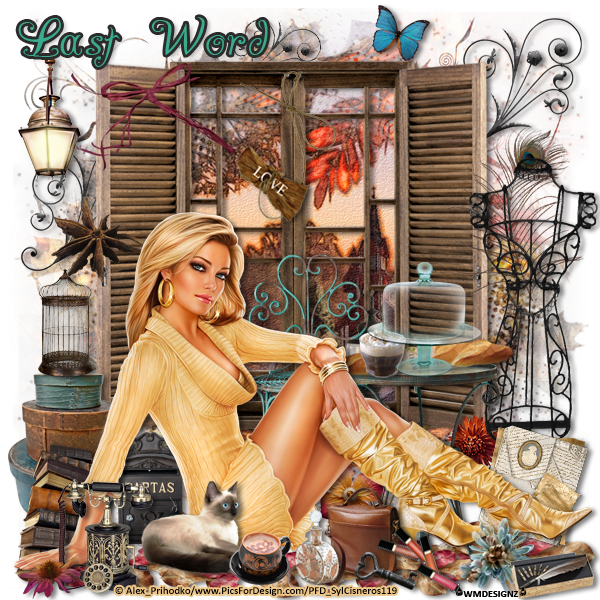
Fall by the Fireside

The creation of this tutorial is my own any resemblance to
any other tutorial is strictly a coincidence.
Do not copy this tutorial or claim it as your own. If you
would like to share it, please share the link to blog ONLY.
This tutorial was written using Adobe Photoshop CS5 and is
for those with a working knowledge of Photoshop. This tutorial can be adapted
for anyone with a working knowledge of PSP.
Before we start, I would like to remind you to save
frequently. This is in case your program closes on you as mine is known to do. J I save as a .psd file. This keeps your
elements in layers instead of merging everything the way a .png file does. I
also I do not say copy and paste your element onto your canvas. In photoshop,
it is possible to drag and drop. But if you are more comfortable copying and
pasting, then by all means do what is easier for you. I also use a white
background while I’m making my tag but I delete it when I am finished. Also, when
I say reduce, I am using the width as a guide. In Photoshop, when you are going
to reduce an element, click on one corner of the element, hold down your shift
key and resize your element. Doing it this way keeps it proportioned.
Supplies needed:
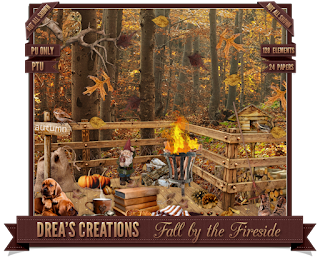
Fall by the Fireside scrap kit from Dreas Designs. You can
find where to buy it here.
The tube I’m using is SoonFall by Alex Prihodko, you can
find it at Pics For Designs. Remember, you cannot use any tubes without a
license.
Mask: Mask 34 made by Splitz
Designs. You can get it here.
I can’t remember where I got the font I used, you can use
any font you want.
Okay, let’s get started.
Open a canvas 600x600.
Create your mask using paper 7. Place in the center of your
canvas or to your liking. Lower Opacity to 82%.
DC 60: Reduce 31.14%. Place in the top part of your canvas
to your liking. Duplicate and place slightly lower on the right side of your
canvas.
DC 82: Reduce 57.77%. Place slightly to the left of your
canvas.
DC 37: Reduce 61.06%. Place in front of DC82 to your liking.
Open your Blending Options.
Check Drop Shadow using the default settings.
Check Outer Shadow – Under Elements – Size = 0
DC 40: Reduce 44.83%. Place on the left side of your canvas.
Add a drop shadow.
DC 28: Reduce 36.57%. Place midway on the right side of your
canvas. Add a drop shadow.
DC 118: Reduce 59.46%. Place on the right side of your
canvas to your liking.
DC 59: Reduce 42.57%. Place on the left of your canvas. I
have mine right under DC 40.
DC 116: Reduce 50.65%. Place over the top of the flame.
DC 46: Reduce 44.05%. Place on the left of your canvas just
at the bottom of the water.
DC 71: Reduce 45.12%. Place midway on the right side of your
canvas. Add a drop shadow.
DC 25: Reduce 36.52%. Place to the lower right of the
birdhouse. Add a drop shadow.
DC 65: Reduce 59.70%. Place centered near the bottom of your
canvas. Add a drop shadow.
DC 3: Reduce 16.39%. Place on the deck slightly off center
to the right. Add a drop shadow. Duplicate and place to the left to your
liking.
DC 7: Flip horizontally. Reduce 23.17% Place on the left of
the deck. Add a drop shadow.
DC 114: Reduce 34.93%. Place on the left of your canvas to
your liking. Add a drop shadow.
DC 24: Reduce 21.12%. Place on the welcome sign to your
liking. Duplicate and add a drop shadow to the lower layer only.
DC 112: Reduce 16.49%. Place to the right of the welcome
sign to your liking. Add a drop shadow.
DC 6: Reduce 17.31%. Place to the right of the leaf on the
left. Add a drop shadow. Duplicate and place it to the lower right of your
canvas.
DC 29: Flip horizontally. Reduce 19.71%. Place at the lower
left of your canvas. Add a drop shadow.
DC 11: Reduce 44.49%. Place on the right side of your
canvas. Add a drop shadow.
DC 90: Reduce 25.66%. Place on the right of your canvas.
It’s going to look like it’s floating in the air. Add a drop shadow.
DC 103: Reduce 21.31%. Place in front of the welcome sign to
your liking. Add a drop shadow.
DC 10: Reduce 21.28%. Place to the right of the books. Add a
drop shadow.
Open your tube, resize and place as if she’s sitting on the
folded blankets. Add a drop shadow.
DC 104: Reduce 17.76%. Place at the bottom left of your
canvas. Add a drop shadow.
DC 31: Reduce 13.16%. Place in the lower center of your
canvas to your liking. Add a drop shadow.
DC 15: Reduce width 21.21%, height 26.98%. Place in the
lower right corner of your canvas. Add a drop shadow.
DC 75: Reduce 21.16%. Place to the left of the welcome sign.
Add a drop shadow.
DC 56: Reduce 16.00 %. Place to the left of the mushrooms.
Add a drop shadow.
DC 105: Reduce 22.98%. Place next to the snail to your
liking. Add a drop shadow.
DC 57: Reduce 25.70%. Place on the lower right corner of
your canvas. Add a drop shadow.
Type the name. Color is 931800. Size 52 points.
Open your Blending Options.
Check Bevel and Emboss using the default settings.
Check Drop Shadow using the default settings.
Check Inner Shadow using the default settings.
Check Stroke size 1 Color is ddb924. Place the name on the
top right of your canvas.
Add your license and your watermark. Delete the white
background if you used one, save as .png and you are done.
I hope this tutorial was easy to follow. Again, you do not
have to follow this step by step. Add your own touch to it.
September 27, 2015
Summers Dying Wish
The creation of this tutorial is my own any resemblance to
any other tutorial is strictly a coincidence.
Do not copy this tutorial or claim it as your own. If you
would like to share it, please share the link to blog ONLY.
This tutorial was written using Adobe Photoshop CS5 and is
for those with a working knowledge of Photoshop. This tutorial can be adapted
for anyone with a working knowledge of PSP.
Before we start, I would like to remind you to save
frequently. This is in case your program closes on you as mine is known to do. J I save as a .psd file. This keeps your
elements in layers instead of merging everything the way a .png file does. I
also I do not say copy and paste your element onto your canvas. In photoshop,
it is possible to drag and drop. But if you are more comfortable copying and
pasting, then by all means do what is easier for you. I also use a white
background while I’m making my tag but I delete it when I am finished. When I
say reduce, I am using the width as a guide.
Supplies needed:
Around Secret Garden scrap kit from Jackie’s Jewels. You can
find where to buy it here.
The tube I’m using is VeryMany’s Carol. You can get it here.
Remember, you cannot use
any tubes without a license.
Mask: Mask 32 made by Splitz Designs. You can get it here.
You can use any font you want.
Okay, let’s get started.
Open a canvas 600x600.
Create your mask using paper 5. Place in the center of your
canvas or to your liking.
Music Notes: Reduce 81.06%. Place on the left top of your
canvas.
Leaves 1: Reduce 40.51%. Place on the right of the music
notes. Add a drop shadow. Duplicate and place halfway down the canvas. Duplicate
again. Flip horizontally, reduce 65.22%. Place on the left side of you canvas
towards the bottom or to your liking.
Go back to your Music Notes, duplicate and place on the
right side of your canvas midway to the bottom.
Frame 1: Reduce 80.46%. Place in the center of your canvas
to your liking. Add a drop shadow.
Falling Leaves: Reduce 72.59%. Place on the right side of
your canvas. Add a drop shadow.
Leaves 3: Reduce 51.65%. Place near the top left of your
frame. Add a drop shadow.
Metal Flower 2: Reduce 23.12%. Place over your 3rd
duplication of Leaves 1 or to your liking. Add a drop shadow.
Berries 2: Reduce 48.00%. Place above Metal Flower 2 to your
liking. Add a drop shadow.
Leaves 4: Reduce 57.61%. Place on the right side of your
frame or to your liking. Add a drop shadow.
Petals: Reduce 27.25%. Place over Berries 2, to your liking.
Add a drop shadow. Duplicate and reduce 75.25%. Place towards the bottom right
of your frame.
Leaves 2: Reduce 55.67%. Place over the Petals on the left
side to your liking. Add a drop shadow.
Bush: Reduce 82.75%. Place on the lower left of your frame
to your liking. Open your blending options. Click on Outer Glow and use these
settings.
Blend Mode: Screen
Opacity: 35%
Noise: 0
Color: ffffff
Technique: Softer
Spread: 0
Size: 0
Street Lamp: Reduce 81.97%. Place to the lower right of your
canvas. Add a drop shadow.
Cart: Reduce 58.56%. Place on the right side of your canvas
over the street lamp. Add a drop shadow.
Scattered Leaves: Reduce 53.61%. Place in the middle bottom
of your canvas in. Add a drop shadow.
At this point I added my tube. Reduce and place to your
liking. Add a drop shadow.
Ribbon 1: Reduce 45.03%. I have mine placed over the feet of
my tube. Add a drop shadow.
Broom: Reduce 66.28%. Place over the cart to your liking. Add
a drop shadow.
Pumpkin 1: Reduce 27.85%. Place on the lower right of your
canvas. Add a drop shadow.
Scattered Leaves: Reduce 57.56%. Place on the lower right
side of your canvas with half the element off the canvas. Add a drop shadow.
Duplicate and place on the left side of your canvas.
Chest 1: Reduce 46.19%. Place to the lower left of your
canvas. Add a drop shadow.
Books 2: Reduce 28.57%. Place on top of the chest. Add a
drop shadow.
Leaves and Hay: Reduce 43.57%. Place in the lower left of
your canvas. Add a drop shadow.
Violin: Reduce 41.96%. Place as if it’s leaning on your
chest, to your liking. Add a drop shadow.
Pine Branch: Reduce 30.54%. Place at the bottom center of
your canvas. Add a drop shadow.
Flower Scatter: Flip horizontally. Reduce 18.95%. Place in
the lower left of your canvas or to your liking. Add a drop shadow.
Bow: Reduce 27.32%. Rotate 24.79 degrees. Place on the
violin and add a drop shadow.
Lantern 2: Reduce 45.09%. Place at the top left of your canvas.
Open your Blending Options.
Check Bevel and Emboss using the default settings.
Check Drop Shadow using the default settings.
Flower Scatter: Reduce 28.95%. Place at the bottom of your
canvas near the chest or to your liking.
Ribbon 2: Reduce 32.87%. Place over the top of the lantern
chain. Add a drop shadow.
Pumpkins: Reduce 30.64%. Place to the lower right of the
pumpkin on the right side of your canvas. Add a drop shadow.
Open your tube. Resize and place to your liking. Add a drop
shadow.
Type the name. Color is 812223. Size 60 points.
Open your Blending Options.
Check Bevel and Emboss using your default settings.
Check Drop Shadow using the default settings.
Check Stroke size 1 Color is 000000.
Place the name on the top right of your canvas.
Add your license and your watermark. Delete the white
background if you used one,
save as .png and you are done.
I hope this tutorial was easy to follow. Again, you do not
have to follow this step by step.
Add your own touch to it.
September 20, 2015
Autumn In Paris
Snags
September 17, 2015
Bonfire Nights
Here are some snags.
September 16, 2015
Mysterious Seduction

Snags for you.
Subscribe to:
Posts (Atom)