Pages

June 30, 2014

Rainbow Beach for Jackies Jewels

PTU CT/Tutorial for Jackie's Jewels using her amazing kit. Rainbow Beach. You can find where to buy it on her blog here.
I used Trinita's Sea Star. You can find it here.


The creation of this tutorial is my own any resemblance to any other tutorial is strictly a coincidence.
Do not copy this tutorial or claim it as your own. If you would like to share it, please share the link to blog ONLY.
This tutorial was written using Adobe Photoshop CS5 and is for those with a working knowledge of Photoshop. This tutorial can be adapted for anyone with a working knowledge of PSP.

Before we start, I would like to remind you to save frequently. This is in case your program closes on you as mine is known to do. J  I save as a .psd file. This keeps your elements in layers instead of merging everything the way a .png file does. I also I do not say copy and paste your element onto your canvas. In photoshop, it is possible to drag and drop. But if you are more comfortable copying and pasting, then by all means do what is easier for you. I also use a white background while I’m making my tag but I delete it when I am finished.

Supplies needed:
Around Rainbow Beach scrap kit from Jackie’s Jewels. You can find where to buy it here.

The tube I’m using is Trinita’s Sea Star from PicsForDesign. You can get it here. Remember, you cannot use any tubes without a license.

Mask: MWD mask 003 made by me. You can get it here.

Font used is Fountain Pen.

Okay, let’s get started.

Open a canvas 550x550.

Create your mask using paper 7. Place in the center of your canvas or to your liking.

JJS31: Reduce 78.9%. Place centered at the top of your canvas. Add a drop shadow.

JJS70: Reduce 74.9%. Place to the left of JJS31 to your liking. Add a drop shadow.

JJS96: Reduce 36.0%. Rotate –7.2. Place to the right of JJS31 to your liking. Add a drop shadow.

JJS62: Reduce 70.1%. Place under the sign on the right side of your canvas. Add a drop shadow.

JJS72: Reduce 37.0%. Place on the pole to your liking. Add a drop shadow.

JJS65: Reduce 93.4%. Place towards the bottom of your canvas on the right side.

JJS110: Reduce 56.7%. Place to the left of the poles to your liking. Add a drop shadow.

Make a duplicate of JJS65, (the sand). Place in front of JJS110. Duplicate. Place at the bottom of your canvas (left side). I have mine half off the canvas.

JJS116: Reduce 16.0%. Place on the left side of the tree.

JJS109: Place on the left of the net to your liking. Add a drop shadow.

JJS93: Reduce 59.2%. Place in the center of your canvas or to your liking. Add a drop shadow. Duplicate and reduce 59.9%. Place on the left side of your canvas towards the bottom. No drop shadow. Duplicate again and place in front slightly lower and off the canvas. Again, no drop shadow.

JJS56: Enlarge 110.6%. Place on the bottom left of the canvas. Add a drop shadow.

JJS29: Reduce 32.0%. Place in front of the tree leaves or to your liking. Add a drop shadow. Duplicate and place on the bottom left of the sign.

JJS71: Flip horizontally. Reduce 35.5%. Place on the left of the chair or to your liking. Add a drop shadow.

JJS14: Reduce 34.4%. Place on the dark pole. Add a drop shadow and an outer glow.

JJS59: Reduce 33.7%. Place hanging off the arm of the chair. Add a drop shadow.

JJS60: Reduce 59.4%. Place under the hanging jar off the canvas. Add a drop shadow. Duplicate and place between the legs of the chair.

JJS19: Reduce 59.8%. Rotate –51.7. Place laying against the poles to your liking. Add a drop shadow.

JJS6: Reduce 33.7%. Place in the lower right corner of your canvas. Add a drop shadow.

JJS50: Reduce 30.5%. Place in front of the guitar to your liking. Add a drop shadow.

JJS110: Reduce 55.3%. Place to the left of the chair at the bottom of your canvas. Add a drop shadow.

JJS20: Reduce 44.8%. Place on the bottom left of the chair leg. Add a drop shadow.

JJS65. Reduce to your liking and place in the bottom left corner of your canvas.

JJS103: Reduce 55.3%. Place in the bottom left corner of your canvas. Add a drop shadow.

Open your tube, reduce to your liking and place on the chair. Add a drop shadow.

JJS15: Reduce 34.8%. Place on the arm of the chair to your liking. Add a drop shadow.

JJS105: Reduce 17.1%. Rotate 7.9. Place in front of the drink or to your liking. Add a drop shadow.

Type the name. Color is FA7EB9. Size 48 points.
Open your Blending Options.
Check Drop Shadow using the default settings.
Check Bevel & Emboss using the default settings.
Check Stroke size 2 Color is 5D032F. Place the name on the top right of your canvas.

Add your license and your watermark. Delete the white background if you used one, save as .png and you are done.


I hope this tutorial was easy to follow. Again, you do not have to follow this step by step. Add your own touch to it.

Sea Side Fun

PTU CT/Tutorial for Trinita Lola using the beautiful SeaStar. She has several different colored layers for you to use.
I used the awesome kit from Jackie's Jewels called Rainbow Beach.


The creation of this tutorial is my own any resemblance to any other tutorial is strictly a coincidence.
Do not copy this tutorial or claim it as your own. If you would like to share it, please share the link to blog ONLY.
This tutorial was written using Adobe Photoshop CS5 and is for those with a working knowledge of Photoshop. This tutorial can be adapted for anyone with a working knowledge of PSP.

Before we start, I would like to remind you to save frequently. This is in case your program closes on you as mine is known to do. J  I save as a .psd file. This keeps your elements in layers instead of merging everything the way a .png file does. I also do not say copy and paste your element onto your canvas. In Photoshop, it is possible to drag and drop. But if you are more comfortable copying and pasting, then by all means do what is easier for you. I use a white background while I’m making my tag but I delete it when I am finished.

Supplies needed:

I’m using the adorable tube SeaStar from Trinita. You can get it here.

I used Rainbow Beach scrap kit by Jackie’s Jewels. You can find where to buy it from her blog here or at Pimpin’ PSPers Warehouse here.

Mask: Mask 2 by HorsePlays Pastures. You can find it here. Please say thank you if you download.

Font used is called Fountain Pen. You can use any font you want though.

Open a canvas 550x550.

Open paper 09 and create your mask. Place on your canvas to your liking.

JJS39: Place on the middle of your canvas almost to the middle of the page. Duplicate and place slightly lower to the left of your canvas. Part of the element is off the left side of the page. Duplicate again placing that copy to your liking but slightly off the canvas on the right. Again, duplicate. Take this copy and place it in the lower left of your canvas to your liking, again, I have some of the element off the canvas. Duplicate one last time bringing it to the right side of your canvas. Once again, mine is off the canvas.

JJS23: Reduce 91.9%. Place at the top of the sand (JJS39) letting a small part of the element go off the canvas or to your liking.

JJS55: Reduce 33.4%. Place on the right side of your canvas to your liking. Add a drop shadow. Duplicate and place at the bottom right of your canvas.

JJS94: Flip horizontally. Reduce 77.0%. Place to your liking on the right side of your canvas. I have the leaves touching the top of the canvas. Add a drop shadow.

JJS120: Reduce 85.2%. Place in the top right of your canvas. Duplicate, flip horizontally and place on the bottom left of your canvas.

JJS8: Place over your tree or to your liking. Add a drop shadow.

JJS110: Reduce 63.2%. Place on the bottom left of JJS8. Add a drop shadow.

JJS30: Flip Horizontally. Reduce 30.8%. Place on the top part of the hut to your liking. Add a drop shadow.

JJS84: Reduce 51.4%. Place on the right side of your canvas near the hut or to your liking. Add a drop shadow.

JJS28: Reduce 34.4%. Place on the left top of the hut to your liking. Add a drop shadow.

JJS91: Reduce 41.7%. Place in front of the chair to the right of your canvas or to your liking. Add a drop shadow.

JJS44: Reduce 61.2%. Place in the lower right of your canvas. Add a drop shadow.

JJS68: Reduce 71.8%. Place slightly off center to the right side of your canvas and at the bottom. Add a drop shadow.

JJS10: Reduce 69.9%. Place on the left side of your canvas to your liking. Add a drop shadow.

JJS17: Reduce 45.8%. Place in front of the basket to your liking. Add a drop shadow.

JJS102: Reduce 28.9%. Place on the right side of the picnic basket.

JJS40: Reduce 31.7%. Place in the lower left corner of your canvas. Duplicate and place on the left of the picnic basket.

JJS84: Reduce 49.0%. Place on the top of picnic basket on the right. Add a drop shadow.

JJS77: Reduce 29.0%. Place to the right of the surfboard to your liking. Add a drop shadow.

JJS78: Reduce 36.1%. Place in front of the beach ball, to your liking. Add a drop shadow.

JJS37: Reduce 29.9%. Place on top of the blue bottle. Add a drop shadow.

JJS48: Reduce 34.9%. Place on the top of the hut by the blue flowers or to your liking. Add a drop shadow and an outer glow.

Open your tube. Size it to your liking seating her on the picnic basket. Add a drop shadow.

Type the name. The color settings are 9E8CF8.  Size 53 points. After you type in your name, go to your blending options.
Check Drop Shadow using default settings.
Check Bevel and Emboss using the default settings.
Check Stroke size 2, color is 494748.
Place the name on the top left of your canvas.

Add your license and your watermark making sure they are legible. Delete the white background. Save as .png and you’re done.


I hope this tutorial was easy to follow. Again, you do not have to follow this step by step. Add your own touch to it. I would love to see your results if you do this tutorial.

June 20, 2014

4th of July Fireworks!

CT/PTU animated tag for Ishika Chowdhury using her beautiful tube Linda. She has many different layers to work with. For this tag, I chose her flag layer. You can buy this awesome tube here at Mystical Scraps.


June 19, 2014

Mermaid Dreaming

CT/PTU tag/tutorial I created using the beautiful Mermaid tube by Trinita.
The kit I used is Mermaid Treasures by Jackie's Jewels.


The creation of this tutorial is my own any resemblance to any other tutorial is strictly a coincidence.
Do not copy this tutorial or claim it as your own. If you would like to share it, please share the link to blog ONLY.
This tutorial was written using Adobe Photoshop CS5 and is for those with a working knowledge of Photoshop. This tutorial can be adapted for anyone with a working knowledge of PSP.

Before we start, I would like to remind you to save frequently. This is in case your program closes on you as mine is known to do. J  I save as a .psd file. This keeps your elements in layers instead of merging everything the way a .png file does. I also do not say copy and paste your element onto your canvas. In Photoshop, it is possible to drag and drop. But if you are more comfortable copying and pasting, then by all means do what is easier for you. I use a white background while I’m making my tag but I delete it when I am finished.

Supplies needed:

I’m using the adorable tube Mermaid from Trinita. You can get it here.

I used Mermaid’s Treasure scrap kit by Jackie’s Jewels. You can find where to buy it from her blog here or at Pimpin’ PSPers Warehouse here.

Mask: WMD Mask 003 by me. You can find it here.

Font used is called Famous Label. You can use any font you want though.

Open a canvas 500x500.

Open paper 03 and create your mask. Place on your canvas to your liking.

SeaWeed 2: Flip Horizontally. Reduce 41.2%. Place on the right side of your canvas. It will look as if it’s floating.

Coral 1: Reduce 44.4%. Place in front of SeaWeed 2, to your liking. Add a drop shadow.

Sand: Reduce 69.8%. Place towards the bottom of your canvas.

Coral 2: Reduce 52.6%. Place in front of Coral 1 to your liking. Add a drop shadow.

Duplicate Coral 1: Reduce 77.8%. Place in front of Coral 2, to your liking. Duplicate again and place it on the left of your canvas, to your liking.

Duplicate Coral 2 and place the layer above the last duplicate of Coral 1. Place it in front and slightly to the right of Coral 2.

Jellyfish 1: Reduce 32.9%. Place on the right side of your canvas, in front of the coral to your liking. Add a drop shadow.

Clamshell: Reduce 79.5%. Open your blending options.
Check Drop Shadow using the default settings.
Check Inner Shadow. Color 000000. The rest use the default settings.

SeaLeaves: Reduce 42.9%. Place inside the clamshell to your liking. Duplicate, flip horizontally. Place towards the top of your clamshell, to your liking.

SeaHorse: Reduce 35.2%. Place on the inside left of your clamshell, to your liking. Add a drop shadow.

 Fish 4: Reduce 30.6%. Place at the bottom of your canvas to your liking. Add a drop shadow.

Coral 3: Reduce 17.8%. Place in front of the coral on the left side of your canvas to your liking. Add a drop shadow.

Netting 2: Enlarge to 115.2%. Place above the top of the clamshell. Duplicate.

Jellyfish 1: Reduce 35.2%. Place at the top left of your canvas. Add a drop shadow.

SeaWeed 2: Reduce 41.4%. Place between the coral and the clamshell to your liking. Add a drop shadow.

Open your tube, reduce and place it on your canvas to your liking. I have mine sitting inside the ClamShell. Add a drop shadow.

SeaWeed 1: Reduce 28.1%. Place in the lower right corner of your canvas. Add a drop shadow. Duplicate and place that one slightly below and to the left of the first one.

SeaTurtle: Reduce 36.7%. Place at the top of the canvas to your liking. Add a drop shadow.

SeaDeco: Reduce 55.0%. Place at the bottom of your canvas between the fish and SeaWeed 1. Add a drop shadow.

Fish 2: Reduce 27.5%. Place on the right side of your tube. Add a drop shadow.

Fish 3: Reduce 22.5%. Place to the left of the clamshell to your liking. Add a drop shadow.

Urchins: Reduce 16.9%. Place in the lower right of your canvas. Add a drop shadow.

Type the name. The color settings are FF6E95.  Size 52.33 points. After you type in your name, go to your blending options.
Check Drop Shadow using default settings.
Check Bevel and Emboss using the default settings.
Check Stroke size 2, color is 095FA1.
Place the name on the top right of your canvas.

Add your license and your watermark making sure they are legible. Delete the white background. Save as .png and you’re done.


I hope this tutorial was easy to follow. Again, you do not have to follow this step by step. Add your own touch to it. I would love to see your results if you do this tutorial.

More Masks From Me....

Instead of doing what I was supposed to I made a few masks to share with you. (I hit a mental block on doing tags :/)
Anyhoo, I hope you like them. If you use them in a tut, please link back to my blog.

WMD Mask 1

 WMD Mask 2

WMD Mask 3

WMD Mask 4

WMD Mask 5

These masks are my creations, please do not claim them as your own.
To download, Click on the mask you want. Right click your mouse then click Save Image As.

June 12, 2014

Sea View

PTU/CT tag made for Jackie's Jewels using her beautiful scrap kit Calming Skies. You can find where to buy her kit here on her blog or at Pimpin' PSPers Warehouse.


Here are some snags for you. I hope you like them.


June 10, 2014

Sea Breeze

CT/PTU tag made with Calming Skies by Jackie's Jewels. By land or sea, there are enough elements to use if you want a tag that's on the beach or underwater. You can find the kit at Pimpin' PSPers Warehouse.
Tube used is Alex Prihodko's On The Beach.


 Here are some snags for you.


June 6, 2014

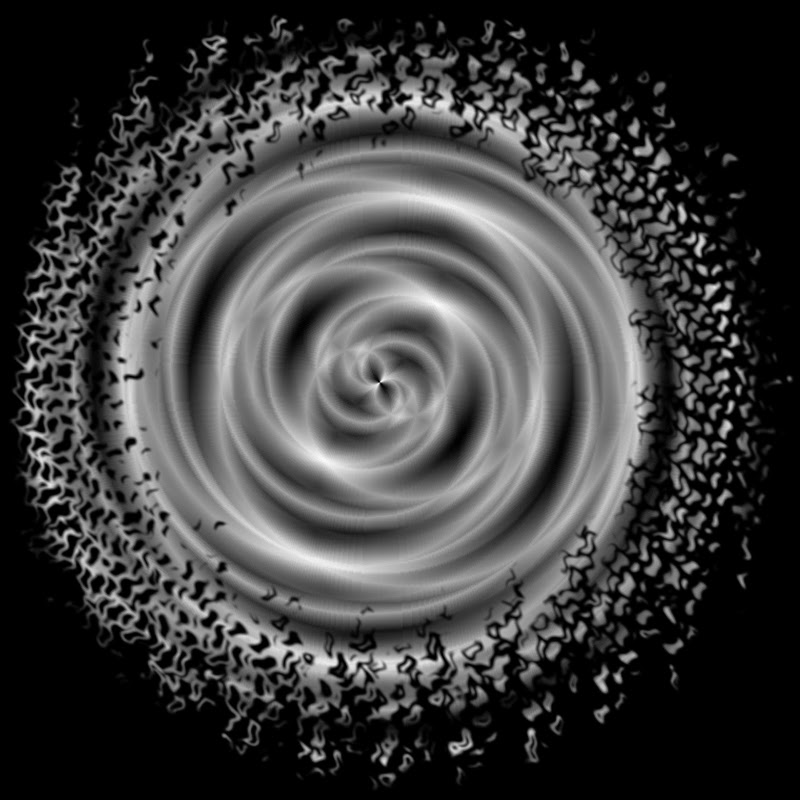
Circular Ripple Mask

 This is something that I made for a tag I was doing. I wanted something different than what I had. Hope you like it. Please leave a word if you download.


To Download: Click on the mask. When it comes up, right click, then click Save As.