Pages

December 28, 2013

CT PTU Tutorial Majestic Christmas

I made this using the beautiful kit Majestic Christmas from Jackie's Jewels.


The creation of this tutorial is my own any resemblance to any other tutorial is strictly a coincidence.
Do not copy this tutorial or claim it as your own. If you would like to share it, please share the link to blog ONLY.
This tutorial was written using Adobe Photoshop CS5 and is for those with a working knowledge of Photoshop. This tutorial can be adapted for anyone with a working knowledge of PSP.

Before we start, I would like to remind you to save frequently. This is in case your program closes on you as mine is known to do. J  I save as a .psd file. This keeps your elements in layers instead of merging everything the way a .png file does. I also I do not say copy and paste your element onto your canvas. In photoshop, it is possible to drag and drop. But if you are more comfortable copying and pasting, then by all means do what is easier for you. I also use a white background while I’m making my tag but I delete it when I am finished.

Supplies needed:
Majestic Christmas scrap kit from Jackie’s Jewels. You can find where to buy it here.

The tube I’m using is Verymany’s Snow Angel. You can get it here. Remember, you cannot use any tubes without a license.

Mask: Snowflake mask 5 by Tonya. You can get it here.

Font used is Adorable. You can use any font you want though.

Open a canvas 500x500.

Create your mask using paper 5 & 6. Place the mask created with paper 5 first, then do the same with the mask using paper 6 in the center of your canvas.

JJS_5 – Reduce 74.1% Place in the center of your canvas. Add a drop shadow.

JJS_61 = Reduce 59.9%. Place on the left side of the frame.

JJS_31 = Reduce 67.9%. Place on the right side of your canvas. Add a drop shadow.

JJS_69 = Flip horizontal. Reduce 38.4%. Place on the lower left corner of your canvas. Add a drop shadow.

JJS_19 = Reduce 32.4%. Place over the presents to your liking. Add a drop shadow.

JJS_56 = Reduce 26.9%. Place over JJS_19 or to your liking. Add a drop shadow.

JJS_58 = Reduce 29.5%. Place inside the frame on the lower left side or to your liking. Add a drop shadow.

JJS_7 = Reduce 48.7%. Rotate 86.4. Flip horizontally. Place on the left side of your canvas. Duplicate.

JJS_8 = Reduce 26.6% Place in the center at the top of your frame. Add a drop shadow.

JJS_12 = Reduce 29.3%. Place at the left of your canvas near the top. Add a drop shadow.

JJS_43 = Duplicate and take the first copy, reduce 21.3%. Place on the right side of your frame. Add a drop shadow. Take the second copy and reduce 27.1%. Place on the left side of your canvas. Add a drop shadow.

JJS_38 = Reduce 28.2%. Rotate –13.3. Place near JJS_43 on the right side to your liking. Add a drop shadow.

Open your tube. Reduce and place on your canvas to your liking. Add a drop shadow.

JJS_27 = Reduce 25.6%. Rotate –55.8. Place in the center at the bottom of your canvas. Add a drop shadow.

JJS_21 = Reduce 29.4%. Place next to JJS_27. Add a drop shadow.

JJS_39 = Reduce 31.8%. Place next to JJS_21. Add a drop shadow.

JJS_72 = Reduce 32.1%. Place in the lower right corner of your canvas. Add a drop shadow.

JJS_13 = Reduce 29.2%. Place in the top right corner of your canvas or to your liking. Add a drop shadow.

JJS_75 = Reduce 22.8%. Place near the bottom left of your canvas. Add a drop shadow.

Type the name. The color settings are C9FCFD.  Size 47 points. After you type in your name, go to your blending options.
Check Drop Shadow using the default settings.
Check Outer Glow using the default settings. Color FFFFFF.
Check Bevel and Emboss using the default settings.
Check Stroke size 2 Color is 074345. Place the name on the top left of your canvas.

Add your license and your watermark. Delete the white background if you used one and you are done.


I hope this tutorial was easy to follow. Again, you do not have to follow this step by step. Add your own touch to it.

December 27, 2013

CT Tag/Tutorial for Divas Designz

I made this tag using the cute kit A Beary Merry Christmas.


The creation of this tutorial is my own any resemblance to any other tutorial is strictly a coincidence.
Do not copy this tutorial or claim it as your own. If you would like to share it, please share the link to blog ONLY.
This tutorial was written using Adobe Photoshop CS5 and is for those with a working knowledge of Photoshop. This tutorial can be adapted for anyone with a working knowledge of PSP.

Before we start, I would like to remind you to save frequently. This is in case your program closes on you as mine is known to do. J  I save as a .psd file. This keeps your elements in layers instead of merging everything the way a .png file does. I also I do not say copy and paste your element onto your canvas. In photoshop, it is possible to drag and drop. But if you are more comfortable copying and pasting, then by all means do what is easier for you. I also use a white background while I’m making my tag but I delete it when I am finished.

Supplies needed:
Diva Designs, A Beary Merry Christmas scrap kit. You can get it at PicsForDesign here.

Tube used is Mary by Trinita. You can get her at PicsForDesign, here.

Mask: Snowflake Mask 3 by Tonya here.

You can use any font you want. I’m using DiskusDMed.

Open a canvas 600x600

Create your mask using Paper 9. Place in the center of your canvas to your liking.

Christmas Tree 2 = Reduce 71.3%. Place in the lower right corner. Add a drop shadow.

Fireplace = Reduce 33.4%. Place on the lower left corner. Add a drop shadow.

Bell Decoration 2 = Reduce 23.7%. Place on the fireplace. Add a drop shadow.

Snowflake 1 = Reduce 19.5%. Place towards the top of the right corner to your liking.

Bauble 5 = Reduce 17.6%. Place slightly over the snowflake. Add an outer glow and drop shadow using the default settings.

Snowflake 2 = Reduce 16.1%. Rotate –18.1. Place in the left hand side of your canvas.

Nutty Snowman = Reduce 25.2%. Place on the fireplace. Add a drop shadow.

Candy Cane 4 = Reduce 39.1% Place in front of the tree. Add a drop shadow.

Holly = Reduce 12.1%. Place near the top right corner to your liking. Add a drop shadow.

Lollipop = Reduce 32.0%. Place in the lower right corner of your canvas. Not touching the bottom. Add a drop shadow.

Logs = Reduce 50.4%. Flip horizontally and place on the fireplace to your liking. Add a drop shadow.

Christmas Gifts = Reduce 18.2%. Place in front of the lollipop. Add a drop shadow.

Open your tube. Reduce and place to your liking on your canvas. Add a drop shadow.

Bow 3 = Reduce 12.1%. Rotate –17.6. Place on top of snowflake 2 or to your liking. Add a drop shadow.

Add the font. Type the name. The color settings are AA0000.  Size 52 points.
Go to your blending options.
Check Drop Shadow
Color: 078F07
Blend Mode: Normal.
Opacity: 100%.
Distance: 4
Spread: 0
Size: 5

Check Stroke size 1. Color is 000000. Place the name at the top left side of your canvas.

Add your license and your watermark. Delete the white background if you used one and you are done.

I hope this tutorial was easy to follow. Again, you do not have to follow this step by step. Add your own touch to it.

December 13, 2013

CT tag for Scrappin' Krazy Designs

Lovely Autumn tutorial for Scrappin' Krazy Designs.


The creation of this tutorial is my own any resemblance to any other tutorial is strictly a coincidence.
Do not copy this tutorial or claim it as your own. If you would like to share it, please share the link to blog ONLY.
This tutorial was written using Adobe Photoshop CS5 and is for those with a working knowledge of Photoshop. This tutorial can be adapted for anyone with a working knowledge of PSP.

Before we start, I would like to remind you to save frequently. This is in case your program closes on you as mine is known to do. J  I save as a .psd file. This keeps your elements in layers instead of merging everything the way a .png file does. Also I do not say copy and paste your element onto your canvas. In photoshop, it is possible to drag and drop. But if you are more comfortable copying and pasting, then by all means do what is easier for you. I also use a white background while I’m making my tag but I delete it when I am finished.

Supplies needed:
Scrappin’ Krazy Designs, Autumn Harvest scrap kit. You can find where to buy it here.

The tube I’m using is Autumn Girl from Arthur Crowe. You can get it here at Arthur Crowes Factory. Remember, you cannot use any tubes without a license.

Mask: 328 from weescottslass here.

Font used is Monotype Cursiva. You can use any font you want though.

Open a canvas 500x500

Create your mask using paper 5. Place on your canvas to your liking.

E 23= Reduce 74.1%. Place in the center of your canvas. Add a drop shadow.

E19 = Place on the right side of your frame to your liking. Add a drop shadow. Duplicate and place on the left side of your frame.

E22 = Reduce 75.7%. Place in the lower right corner of  the canvas. Add a drop shadow.

E18 = Reduce 28.2%. Place on the right side of the frame, near the tree stump. Add a drop shadow. Duplicate and place on the frame towards the top of E19.

E33 = Place in the center of frame. Add a drop shadow.

E19 = Rotate 90 degrees CW. Reduce 62.9%. Place in the lower right corner of your canvas. Add a drop shadow.

E09 = Reduce 41.8%. Place on the left side of the canvas. Add a drop shadow.

E29 = Reduce 52.8%. Place on the right side by the tree stump. Add a drop shadow.

E28 = Reduce 28.8%. Place in front of the tree stump. Add a drop shadow.

E06 = Reduce to these dimensions:
Width: 73.1%.
Height: 97.6%
Place at the top of the frame. Add a drop shadow.

E32 = Reduce 70.2%. Place towards the top of your frame on the left side. Add a drop shadow.

E27= Reduce 34.9%. Rotate -30.2. Place in the lower left corner of the canvas. Add a drop shadow. Duplicate and place at the bottom center of the canvas.

Open your tube and place it in the center of the canvas to your liking. Add a drop shadow.

E21=Reduce 27.2%. Place in the lower left corner of the canvas. Add a drop shadow.

Type the name. The color settings are F9CC01.  Size 72 points. After you type in your name, go to your blending options.
Check Drop Shadow using the default settings.
Check Bevel and Emboss using the default settings.
Check Stroke size 2 Color is 700A1D. Place the name on the top right of the canvas.

Add your license and your watermark. Delete the white background if you used one and you are done.


I hope this tutorial was easy to follow. Again, you do not have to follow this step by step. Add your own touch to it.

December 12, 2013

CT Tag Jackie's Jewels

CT Tag & Snags using Winterberry by Jackie's Jewels. The non traditional colors and shades of purple made this kit great to work with.

Check out her blog and get this beautiful kit from Pimpin' PSPers Warehouse.

Tube used is Rose by Di_Halim. You can purchase her at PicsForDesign.


Snags for you


December 10, 2013

CT tag & Snags with Winterberry

I made this with the beautiful kit called Winterberry from Jackies Jewels. You can buy this kit from Pimpin' PSPer's Warehouse.
Tube used is Snow Girl from Alex Prihodko. You can get it from PicsForDesign. Remember, you have to have a license to use any tube.


Snags for you.


November 26, 2013

Show off tag Wild Thing

I made this for a challenge in Pimpin' PSPers and I absolutely LOVE the way it came out.
Tube is from Gennadiy Koufay.


October 9, 2013

Haunting Grounds


CT tag for Ruinations by Hayleigh using the fantastic scrap kit Haunting Grounds.

It has so many elements, I barely scratched the surface of them with my tags. You can buy it HERE.


October 1, 2013

Fall Wishes

CT PTU Tutorial for Diva Designz.

The creation of this tutorial is my own any resemblance to any other tutorial is strictly a coincidence.
Do not copy this tutorial or claim it as your own. If you would like to share it, please share the link to blog ONLY.
This tutorial was written using Adobe Photoshop CS5 and is for those with a working knowledge of Photoshop. This tutorial can be adapted for anyone with a working knowledge of PSP.

Before we start, I would like to remind you to save frequently. This is in case your program closes on you as mine is known to do. J  I save as a .psd file. This keeps your elements in layers instead of merging everything the way a .png file does. I also I do not say copy and paste your element onto your canvas. In photoshop, it is possible to drag and drop. But if you are more comfortable copying and pasting, then by all means do what is easier for you. I also use a white background while I’m making my tag but I delete it when I am finished.

Supplies needed:
Diva Designs, Fall Wishes scrap kit. You can find get it at PicsForDesign here.

Tube used is from Caron Vinson. You can get it at CDO here.

Mask: Designs by Vabys, Mask 92 here. Scroll down to the middle of the page to get to set 91-104.

You can use any font you want.

Open a canvas 600x600

Create your mask using Paper 4. Place in the center of your canvas to your liking.

Frame 3 = Reduce to these dimensions:
Width = 51.1%
Height = 50.5%
Rotate = -9.7

Open Paper = Rotate -9.7. Size to fit inside the frame. Merge Paper and Frame 3. Add a drop shadow.

Button 2 = Reduce 9.1. Reduce Opacity 70%. Duplicate 3 times. Place to your liking inside the frame.

Open your tube, resize and place in the middle of your canvas. Add a drop shadow.

Autumn Scene = Reduce to these dimensions:
Width = 61.4%
Height = 60.9%
Rotate = -6.5
Place in at the bottom of the frame. Add a drop shadow.

Bow 11 = Reduce 51.8%. Rotate 30.9. Place on the lower left side of your frame behind the tube. Add a drop shadow.

Flower 4 = Reduce 22.9%. Place on the right side of your frame under Autumn Scene. Add a drop shadow.

Autumn Branch = Duplicate. Take your first copy, reduce 50.7%. Rotate 76.8. Place on the left side of your frame behind Autumn Scene. Add a drop shadow.
Take your duplicate, reduce 441%. Rotate 78.2. Place in front of the first copy, slightly lower or to your liking. Add a drop shadow.

Bow 1 = Reduce 17.3. Place on the top right of the frame. Add a drop shadow.

Add the font. Type the name. The color settings are FF8900.  Size 60 points.
Go to your blending options.
Check Drop Shadow using the default settings.
Check Bevel and Emboss. On your shading box, Gloss Contour, use Cone.
Under Bevel and Emboss check Contour, use Rolling Slope Descending.
Check Stroke size 2. Color is 8F5C2E. Place the name at the top left side of your canvas.

Keyring 1 = Reduce 14.5%. Place under one of the letters of the name. I have it looking as if it’s hanging from a letter. Go to your Blending Options.
Check Drop Shadow using the default settings.
Check Outer Glow = Size 2.

Add your license and your watermark. Delete the white background if you used one and you are done.


I hope this tutorial was easy to follow. Again, you do not have to follow this step by step. Add your own touch to it.


Here are some snags for you.


September 30, 2013

Fairy Princess

CT/PTU tutorial for Scrappin’ Krazy Designs.


The creation of this tutorial is my own any resemblance to any other tutorial is strictly a coincidence.
Do not copy this tutorial or claim it as your own. If you would like to share it, please share the link to blog ONLY.
This tutorial was written using Adobe Photoshop CS5 and is for those with a working knowledge of Photoshop. This tutorial can be adapted for anyone with a working knowledge of PSP.

Before we start, I would like to remind you to save frequently. This is in case your program closes on you as mine is known to do. J  I save as a .psd file. This keeps your elements in layers instead of merging everything the way a .png file does. I also I do not say copy and paste your element onto your canvas. In photoshop, it is possible to drag and drop. But if you are more comfortable copying and pasting, then by all means do what is easier for you. I also use a white background while I’m making my tag but I delete it when I am finished.

Supplies needed:
Scrappin’ Krazy Designs, Autumn’s Song scrap kit. You can find where to buy it here.

The tube I’m using is VeryMany’s Flower Fairy. You can get it here at PicsForDesign. Remember, you cannot use any tubes without a license.

Mask: Chas Mask 22 here. It’s the 3rd set from the top.

Font used is Blessed Day. You can use any font you want though.

Open a canvas 600x600

Create your mask using paper 18. Place on your canvas to your liking.

Frame 1= Reduce to your liking. Place in the center of your canvas. Add a drop shadow.

Open your tube. Reduce to your liking and place in the middle of your canvas. Not completely at the bottom. Add a drop shadow.

Type the name. The color settings are D0E8F7.  Size 116 points. After you type in your name, go to your blending options.
Check Drop Shadow using the default settings.
Check Bevel and Emboss:
Structure - Inner Bevel
Technique - Smooth
Depth - 100%
Direction - Up
Size - 5
Soften – 0
Shading:
Angle – 120
Check Global Light box
Attitude – 30
Highlight Mode – Screen Color EAB0C3
Opacity - 75%
ShadowMode - Multiply
Opacity – 75%
Check Stroke size 3 Color is 0F0351. Place the name on the bottom left of your canvas.

Add your license and your watermark. Delete the white background if you used one and you are done.


I hope this tutorial was easy to follow. Again, you do not have to follow this step by step. Add your own touch to it.

September 29, 2013

Autumn Dreams

CT show off tag for Ruinations by Hayleigh.
Kit used was Falling for Autumn. You can find where to buy it HERE.


Falling for Autumn

PTU/CT tutorial for Ruinations by Hayleigh


The creation of this tutorial is my own any resemblance to any other tutorial is strictly a coincidence.
Do not copy this tutorial or claim it as your own. If you would like to share it, please share the link to the site this is posted on ONLY.
This tutorial is written using Adobe Photoshop CS5 and is for those with a working knowledge of Photoshop. This tutorial can be adapted for anyone with a working knowledge of PSP.

Before we start, I would like to remind you to save frequently. This is in case your program closes on you as mine is known to do. J  I save as a .psd file. This keeps your elements in layers instead of merging everything the way a .png file does. I also I do not say copy and paste your element onto your canvas. In photoshop, it is possible to drag and drop. But if you are more comfortable copying and pasting, then by all means do what is easier for you. I also use a white background while I’m making my tag but I delete it when I am finished.

Supplies needed:
Ruinations by Hayleigh’s Falling for Autumn. You can get the kit here.

The tube I’m using is from Arthur Crowe’s Beauty in Autumn. You can get it here at Arthur Crowe’s Factory.  Remember, you cannot use any of his tubes without a license.

Mask is made by me called Feathered Mask. You can find it HERE on my blog.

Font of choice. I used AR Berkley.

Open a canvas 600x600

Create your mask using paper Falling for Autumn P(1). Place in the center of your canvas and lower your opacity to 45%.

E32 = Place the top part of the element at the bottom of your canvas. The majority of it will be off the canvas.

E69 – Duplicate. Take one copy and flip horizontally.
Reduce to these dimensions:
Width: 75%
Height: 68.8%
Rotate: -2.3
Lower opacity to 78%. Place at the top of your canvas to your liking.

Take your second copy.
Reduce to these dimensions:
Width: 85.9%
Height: 87%
Rotate: -13.2
Lower opacity to 87%. Place in the middle of your canvas.

E70 = Duplicate. Take the first copy and reduce 61.5%. Rotate: 3.3
Lower opacity to 78%. Place at the top of your canvas to your liking with element 69.

Take your second copy. Reduce 71.8%. Rotate: -20.7. Lower opacity to 87%. Place in the middle of your canvas with element 69.

E35 = Duplicate. Take your first copy and reduce 90.2%. Place on the left side of your canvas under elements 69 & 70 that are in the middle. Add a drop shadow.
Take the 2nd copy and reduce 77.4%. Place on the right side of your canvas. Add a drop shadow.

E11 = Reduce 54.2%. Place in front of the tree on the right side. Place it higher than the base of the tree. Add a drop shadow.

E17 = Reduce 11.3%. Place sitting on the lower branch of the tree on the right side of your canvas. Add a drop shadow.

E34 = Reduce 18.6%. Rotate -31.5. Place on the left side of your canvas by the tree. Add a drop shadow.

E24 = Reduce 70.4%. Center at the bottom of your canvas. Duplicate.

Open your tube. Resize it to look as if she’s kneeling or on the small bridge. Place between E24 and the duplicate. For mine, I zoomed in close and erased the rail so her fingers were showing. You may or may not have to do this, depending on what tube you are using. Add a drop shadow to the bottom layer of E24 and to your tube.

E44 = Reduce 16.8%. Place on the right side of your canvas, to your liking. Add a drop shadow.

E28 = Duplicate twice. Take the first copy and reduce 13.6%. Place off center to the left towards the bottom of your canvas. Add a drop shadow.
Take the second copy, reduce 13.9%. Place slightly lower and to the right of the first mushroom. Add a drop shadow.
Take the last copy, reduce 13.4%. Place in front of both mushrooms. Add a drop shadow.

E41 = Reduce 26.2%. Place in front of the bridge on the right side. Add a drop shadow.

E19 = Reduce 9.0%. Rotate -65.4. Place in the center of your canvas at the bottom or to your liking. Add a drop shadow.

E(1) 1 = Reduce 34.3%. Place on the lower right corner of your canvas. Add a drop shadow.

E69 = Reduce 86.2%. Place in front of the bridge.

E5 = Flip Horizontally. Reduce 22.6%. Place on the lower left corner of your canvas. Add a drop shadow.

Type your name using this setting for the color. EDBC32.
Open your Blending Options.
Check Drop Shadow using the default settings.
Check Bevel & Emboss using the default settings.
Check Stroke, size 3. Color 180A02.

Add your license and your watermark. Delete the white background. Save as .png and you’re good to go.


I hope you enjoyed doing this tutorial.

September 27, 2013

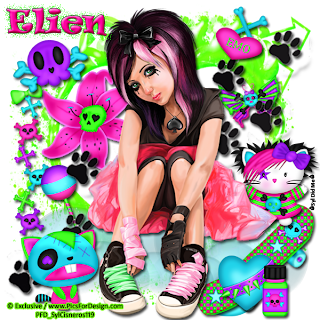
Emolicious

CT/PTUTutorial for Waggish Sparkles.


The creation of this tutorial is my own any resemblance to any other tutorial is strictly a coincidence.
Do not copy this tutorial or claim it as your own. If you would like to share it, please share the link to blog ONLY.
This tutorial was written using Adobe Photoshop CS5 and is for those with a working knowledge of Photoshop. This tutorial can be adapted for anyone with a working knowledge of PSP.

Before we start, I would like to remind you to save frequently. This is in case your program closes on you as mine is known to do. J  I save as a .psd file. This keeps your elements in layers instead of merging everything the way a .png file does. I also I do not say copy and paste your element onto your canvas. In photoshop, it is possible to drag and drop. But if you are more comfortable copying and pasting, then by all means do what is easier for you. I also use a white background while I’m making my tag but I delete it when I am finished.

Supplies needed:
Emolicious scrap kit by Waggish Sparkles. You can find where to buy it here.

The tube I’m using is and Exclusive from PicsForDesign Emo Girl Lielman. You can get it here. Remember, you cannot use any tubes without a license.

Font used is Ravie. You can use any font you want though.

Open a canvas 600x600

Frame 6 = Use these dimensions:
Width - 94.7%
Height – 113.0% Place in the center of your canvas to your liking.

Open your tube, resize it to your liking then place it on your canvas. Add a drop shadow.

Flower 2 = Reduce 34.2%. Place on the top left corner of your frame. Add a drop shadow.

Bubbles 1 = Place under the tube. I have mine looking as if she is sitting on the bubbles.

Skateboard = Reduce 46.4%. Place in the lower right hand corner of your canvas. Add a drop shadow.

Heart 1 = Reduce 26.6%. Place near the skateboard. Add a drop shadow.

Bottle 2 = Reduce 16.6%. Place in front of Heart 1. Add a drop shadow.

Emo String = Reduce 42.4%. Place on the left side of your canvas. Add a drop shadow.

Pop 1 = Reduce 34.6%. Rotate –23.3. Place on the left side of your tube. Add a drop shadow.

Butterfly 2 = Reduce 18.7%. Rotate –11.9. Add on the right side of your tube. Add a drop shadow.

Skull 2 = Reduce 24.4%. Rotate –14.9. Place near the top of the Emo String. Add a drop shadow.

Paws = Take your first copy rotate 6.1. Place behind your tube towards the top right of your frame or to your liking. Add a drop shadow. Duplicate and place that one on the lower left of your canvas or to your liking.

Heart 3 = Reduce 20.2%. Rotate 25.6. Place on the upper right side of your canvas. Add a drop shadow.

Cat 1 = Reduce 29.7%. Place on the bottom left corner of your canvas. Add a drop shadow.

Cat 2 = Reduce 27.9%. Place on the right side of your tube. Add a drop shadow.

Type the name. The color settings are FF00A1.  Size 57 points. After you type in your name, go to your blending options.
Check Drop Shadow using these settings. Color 44FF24
Blend Mode: Dissolve
Angle - 120
Distance - 0
Spread - 8
Size - 13
Check Bevel & Emboss.
Shading –
Angle 120
Check Use Global Light
Highlight mode – Screen color FFFFFF
Opacity – 75%
Shadow Mode
Multiply - Color 80FF15
Opacity 75%
Check Stroke size 1. Color is 2F241F.
Position – Outside
Blend – Normal
Opacity 100%
Place the name on the top left of your canvas.

Add your license and your watermark. Delete the white background if you used one. Save as .png and you are done.

September 26, 2013

Falling for Autumn

Show off CT tag for Ruinations by Hayleigh. I used the beautiful kit Falling for Autumn. You can find where to get it HERE.
Tube is Beauty in Autumn from Arthur Crowes Factory. You can find it HERE.


September 17, 2013

Lady Leopard

CT/PTU tutorial for Alexis's Graphics Palace.


The creation of this tutorial is my own any resemblance to any other tutorial is strictly a coincidence.
Do not copy this tutorial or claim it as your own. If you would like to share it, please share the link to the site this is posted on ONLY.
This tutorial is written using Adobe Photoshop CS5 and is for those with a working knowledge of Photoshop. This tutorial can be adapted for anyone with a working knowledge of PSP.

Before we start, I would like to remind you to save frequently. This is in case your program closes on you as mine is known to do. J  I save as a .psd file. This keeps your elements in layers instead of merging everything the way a .png file does. I also I do not say copy and paste your element onto your canvas. In photoshop, it is possible to drag and drop. But if you are more comfortable copying and pasting, then by all means do what is easier for you. I also use a white background while I’m making my tag but I delete it when I am finished.

Supplies needed:
Alexis’s Graphics Palace scrap kit Lovely Leopard. You can find where to buy it here.

The tube I’m using is from Elias Chatzoudis. I bought it at PTE but you can get it here at Elias Art Shop.  Remember, you cannot use any of his tubes without a license.

Font of choice. I used Daniela.

Open a canvas 600x600

E58 = Use these dimensions:
Width – 116.0%
Height – 158.7%
Place in the middle of your canvas.

Frame 02 = Reduce 76.5%. Place in the middle of your canvas.

Open paper 10. Drag it behind your frame resizing it enough that it is sticking out from the entire frame. Activate your frame layer. Using your magic wand, click inside the top and bottom frames. (To do this, click on the top frame, you will see the marching ants. Holding down your Shift button. Click on the lower frame. Now you will have the marching ants in both frames.) Go to Select>Modify>Expand. Expand selections by 10 pixels.
Activate your paper layer. Go to Select>Inverse, then hit delete. Click on any part of your canvas with your magic wand to deselect or go to Select>Deselect.

Open paper 09. Bring it  behind your frame, resizing it like you did paper 10. Activate your frame layer. Using your magic wand, click in the middle part of the frame. Go to Select>Modify>Expand. Expand selections by 10 pixels. Activate paper 09. Go to Select>Inverse, then hit delete. Click on any part of your canvas with your magic wand to deselect or go to Select>Deselect.

E47 = Reduce 22.1%. Place on the right side of your canvas, towards the middle. Add a drop shadow.

E42 = Place on top of your frame towards the right side or to your liking. Add an Outer Glow.

E56 = Reduce 29.1%. Place on your frame to your liking. Add a drop shadow.

E21 = Reduce 45.3%. Rotate 18.6. Place towards the top right of your canvas. Add a drop shadow.

E06 = Reduce 28.2%. Rotate 14.8. Place towards the lower right side of your canvas to your liking. Add a drop shadow.

E09 = Reduce 11.2%. Place near the lower right side of your canvas. Add a drop shadow.

Open your tube, resize and place it on your canvas to your liking. Mine looks as if her hand is resting on E09, Add an Outer Glow and a drop shadow.

E18 = Reduce 33.5%. Place on the top left side next to your frame. Add a drop shadow.

E03 = Reduce 35.1%. Rotate 12.4. Place on the left side of your frame to where it’s touching E18. Add a drop shadow.

E45 = Reduce 44.4%. Place next to E09. Add a drop shadow.

E33 = Reduce 44.1%. Rotate 38.3. Place in front of elements E09 and E45. Add a drop shadow.

E34 = Reduce 47.2%. Place next to E33. Add a drop shadow.

E10 = Reduce 37.4%. Rotate -16.8. Place on the left side of the frame. Add a drop shadow.

E13 = Reduce 23.8%. Place at the top of the right hand of your canvas.

E49 = Reduce 57.2%. Place in front of your tube towards the left side of the canvas. Add a drop shadow.

E07 = Reduce 33.5%. Place on the lower right side of your canvas. Add a drop shadow.

E16 = Reduce 36.3%. Place on the lower left corner of your canvas. Add a drop shadow and outer glow. Take your duplicate and reduce 36.1%. Place slightly lower than the first copy. Add a drop shadow and outer glow.

Add your font using this setting for the color. FF009C.
Open your Blending Options.
Check Drop Shadow using the default settings.
Check Bevel & Emboss using the default settings. Go to your Gloss Contour, click on Rolling Slope – Descending.
Check Stroke, size 2. Color 590628.

Add your license and your watermark. Delete the white background. Save as .png and you’re good to go.


I hope you enjoyed doing this tutorial.

September 13, 2013

Playful Autumn

CT/PTU tutorial for Divas Designz.


The creation of this tutorial is my own any resemblance to any other tutorial is strictly a coincidence.
Do not copy this tutorial or claim it as your own. If you would like to share it, please share the link to blog ONLY.
This tutorial was written using Adobe Photoshop CS5 and is for those with a working knowledge of Photoshop. This tutorial can be adapted for anyone with a working knowledge of PSP.

Before we start, I would like to remind you to save frequently. This is in case your program closes on you as mine is known to do. J  I save as a .psd file. This keeps your elements in layers instead of merging everything the way a .png file does. I also I do not say copy and paste your element onto your canvas. In photoshop, it is possible to drag and drop. But if you are more comfortable copying and pasting, then by all means do what is easier for you. I also use a white background while I’m making my tag but I delete it when I am finished.

Supplies needed:
Diva Designs, Autumn Fantasy scrap kit. You can find get it at PicsForDesign here.
The adorable posers that I used are included in the kit. If you use them, check the TOU for the correct copyright.

Mask: Designs by Vabys, Mask 89 here. Scroll down to the middle of the page to get to set 79-90.

Font used is Cambria. You can use any font you want though.

Open a canvas 600x600

Create your mask using Paper 4. Place in the center of your canvas to your liking.

Leaf 1 = Reduce 51.2%. Rotate -10.8. Place towards the top of the canvas. Lower opacity 61%.

Key ring 1 = Reduce 53.8%. Place in the middle of your canvas. Add a drop shadow.

Poser 4 = Reduce 56.3%. Place as if she’s kneeling in the key ring. Add a drop shadow.

Poser 1 = Reduce 33.0%. Place on the lower left side of your canvas. Add a drop shadow.

Poser 3 = Reduce 31.6%. Place on the lower right side of your canvas. Add a drop shadow.

**NOTE** These elements go under the posers.

Flower 8 = Reduce 12.6%. Place above Poser 3’s head. Add a drop shadow.

Brad 1 = Reduce 19.0%. Place near the heart on the key ring.

Leaf 13 = Flip horizontally. Reduce 30.6%. Place on the left side of the heart of the key ring. Add a drop shadow.

Leaf 6 = Reduce 32.6%. Place to your liking by Leaf 13. Add a drop shadow.

Gems = Reduce 27.9%. Rotate -20.0. Place in the middle of the canvas towards the bottom.

Berries 2 = Flip vertically then flip horizontally. Reduce 23.1%. Rotate -52.7. Place at the top of your canvas towards the left side. Add a drop shadow.

Berries 1 = Flip vertically then flip horizontally. Reduce 27.3%. Rotate -89.5. Place near Berries 1 or to your liking. Add a drop shadow.

Leaf 3 = Place near the top right corner of your canvas. Add a drop shadow.

Flower 7 = Reduce 20.9%. Place on the left of Leaf 3 or to your liking. Add a drop shadow.

**NOTE** These elements are in front of the key ring but behind the posers.

Bow 1 = Reduce 9.89.8%. Rotate -7.7. Place on the left side of the heart key ring towards the bottom. Add a drop shadow.

Leaf 5 = Flip vertically. Reduce 20.5%. Rotate -21.6. Place at the bottom left of your canvas. Add a drop shadow.

Leaf 10 = Reduce to these dimensions:
Width – 25.7%
Height – 35.4%
Rotate - -46.7
Place in the lower left corner. I have the fairy looking like she’s standing on it. Add a drop shadow.

Leaf 15 – Reduce 24.7%. Place on top of the other 2 leaves to your liking. Add a drop shadow.

Flower 10 = Reduce 11.1%. Place on the left side of your canvas near the fairy poser or to your liking. Add a drop shadow. Duplicate and place near Berries 1 to your liking. Add a drop shadow.

Go back to the Gems. Duplicate and place over the key ring towards the top of your canvas.

Tree 1 = Reduce 41.7%. Place behind the fairy poser on the right. Add a drop shadow.

Leaf 8 = Reduce 20.1%. Place at the bottom of your canvas in the middle. Add a drop shadow.

Ladybird 2 = Duplicate. Take your first copy and reduce 5.6%. Rotate 32.6. Place on the flower at the top right of your canvas. Add a drop shadow. Reduce your duplicate copy 6.6%. Rotate 33.7. Place on the heart of the key ring. Add a drop shadow.

Fan 3 = Reduce 18.5%. Rotate 16.6. Place on the right side of your canvas between the leaf and flower. Add a drop shadow.

Ladybird 1 = Reduce 9.8%. Rotate -16.7. Place on the left side of your canvas to your liking. Add a drop shadow.

Add the font. Type the name. The color settings are FF7B12.  Size 76 points.
Go to your blending options.
Check Drop Shadow using the default settings.
Check Bevel and Emboss. On your shading box, Gloss Contour, use Rolling Slope Descending.
Check Stroke size 3. Color is 4E2F09. Place the name at the bottom in the middle of your canvas.

Add your license and your watermark. Delete the white background if you used one and you are done.


I hope this tutorial was easy to follow. Again, you do not have to follow this step by step. Add your own touch to it.

September 12, 2013

Autumn's Song

CT/PTU for Scrappin' Krazy Designs


The creation of this tutorial is my own any resemblance to any other tutorial is strictly a coincidence.
Do not copy this tutorial or claim it as your own. If you would like to share it, please share the link to blog ONLY.
This tutorial was written using Adobe Photoshop CS5 and is for those with a working knowledge of Photoshop. This tutorial can be adapted for anyone with a working knowledge of PSP.

Before we start, I would like to remind you to save frequently. This is in case your program closes on you as mine is known to do. J  I save as a .psd file. This keeps your elements in layers instead of merging everything the way a .png file does. I also I do not say copy and paste your element onto your canvas. In photoshop, it is possible to drag and drop. But if you are more comfortable copying and pasting, then by all means do what is easier for you. I also use a white background while I’m making my tag but I delete it when I am finished.

Supplies needed:
Scrappin’ Krazy Designs, Autumn’s Song scrap kit. You can find where to buy it here.

The tube I’m using is VeryMany’s Estelle. You can get it here at PicsForDesign. Remember, you cannot use any tubes without a license.

Mask: tprwb_autumnfall12mask1 here. Scroll down to the bottom for the Autumn Masks Set.

Font used is Janagrace. You can use any font you want though.

Open a canvas 600x600

Create your mask using paper 18. Place on your canvas to your liking.

Frame 1= Reduce to your liking. Place in the center of your canvas. Add a drop shadow.

Open your tube. Reduce to your liking and place in the middle of your canvas. Not completely at the bottom. Add a drop shadow.

Note: All these elements are behind your frame and tube.

E70 = Reduce 81.7%. Place behind the frame on the top right corner. Add a drop shadow.

E72 = Reduce 31.7%. Place in front of the barn in the top right part of the frame. Add a drop shadow.

E46 = Reduce 43.0%. Place in the left open part of the frame to your liking. Add a drop shadow.

E16 = Reduce 53.1%. Place near the tree stump or to your liking. Add a drop shadow. Duplicate and place near the pumpkin to your liking.
Duplicate again and place on the bottom right corner of the barn.
E78 = Place on the top right corner of your canvas leaving about ¼ of it off the canvas.
E.2 = Reduce to these dimension:
Width – 73.6%
Height – 77.9%
Rotate -8.0
Place in the center of your frame. Add a drop shadow.

NOTE: These elements are in front of your frame.

E09 = Reduce 37.7%. Place towards the top of your frame. Add a drop shadow.

E55 = Place towards the left side of your frame. Add a drop shadow.

E22 = Place towards the top right of your frame. Add a drop shadow.

E23 = Place on the right side of your canvas. Add a drop shadow.

E49 = Reduce 57.1%. Duplicate once then merge with the original layer. Hold your Ctrl key down and hit E to do this. Place in the lower left corner of your canvas. Add a drop shadow.

E37 = Reduce 37.5%. Place in towards the top of your frame or to your liking. Add a drop shadow.

E18 = Reduce to these dimensions:
Width – 48.1%
Height – 54.0%
Rotate - 12.0

E13 = Reduce 43.4%. Place on the tree that is with your frame to your liking. Add a  drop shadow.

E06 = Reduce 29.0%. Duplicate twice. Place first copy near element 18 or to your liking. Add a drop shadow. Place second copy on the lamp pole. Add a drop shadow. Take the last copy, place on the left side of your canvas towards the middle. Add a drop shadow.

E04 = Reduce 33.4%. Place on top of the lamp pole to your liking making sure it’s under element 06. Add a drop shadow.

E08 = Reduce 36.7%. Place near the top left of the frame. Add a drop shadow.

E01 = Duplicate. Reduce the first copy 46.3%. Place on the left side of the frame at the bottom. Add a drop shadow. Take the second copy and reduce 52.0%. Place in the open space of your frame on the right side. Add a drop shadow.

E32 = Reduce 36.3%. Place on the lower right side of your canvas, at the base of the lamp post. Add a drop shadow.

E02 = Reduce 73.6%. Place on the left side of your frame to your liking. Add a drop shadow.

Note: I placed these elements in front of the tube.

E43 = Reduce 24.9%. Place in the lower right corner of your canvas. Add a drop shadow.

E53 = Reduce 84.9%. Flip horizontally. Place in the middle of your canvas, towards the bottom.

E16 = Duplicate 3 times. Reduce your first copy 52.0%. Place in the middle of your canvas at the bottom. Add a drop shadow. Take a copy and reduce it 38.7%. Place it slightly off center towards the right side of your canvas on the bottom. Add a drop shadow. Take another copy and reduce 40.3%. Place it on the bottom left corner of your canvas. Add a drop shadow. Take the last copy, reduce 43.7%. Place it on the lower right side of your canvas. I have it slightly off the canvas. Add a drop shadow.

E19 = Reduce 55.6%. Place it in the bottom right side of your canvas. Add a drop shadow.

E29 = Place it in the middle of your canvas at the bottom. Add a drop shadow.

E30 = Reduce 32.6%. Place in front of the basket to your liking. Add a drop shadow.

E14 = Reduce 52.0%. Place in the lower left corner of your canvas or to your liking. Add a drop shadow.

E15 = Reduce 34.1%. Place on the top of the frame. Making it look like the owl is sitting on the top right side of the frame. Add a drop shadow.

E73 = Rotate 90o CCW. Reduce 59.1%. Place in front of the basket or to your liking. Add a drop shadow. Duplicate and place off to the right and slightly lower than the first copy.

E31 = Rotate 90o CCW. Reduce 41.0%. Place at the bottom slightly off center of your canvas or to your liking. Rotate again -17.7. Add a drop shadow.

E24 = Reduce 48.2%. Place at the bottom slightly off center of your canvas or to your liking. Add a drop shadow.

Type your name. The color settings are F4882D.  Size 72 points. After you type in your name, go to your blending options.
Check Drop Shadow using the default settings.
Check Bevel and Emboss. On your shading box, Gloss Contour, use Cove Deep.
Check Stroke size 2. Color is 311E08. Place the name on the top left of your canvas.

Add your license and your watermark. Delete the white background if you used one and you are done.


I hope this tutorial was easy to follow. Again, you do not have to follow this step by step. Add your own touch to it.

Sounds of Autumn

 Show off tag for Scrappin' Krazy Designs using the kit Autumn's Song.


You can find where to get the kit HERE.
Tube used is VeryMany's Michelle, available at PicsForDesign.

September 4, 2013

Creating Mischief

CT/PTU tutorial for Alexis's Graphics Palace.


The creation of this tutorial is my own any resemblance to any other tutorial is strictly a coincidence.
Do not copy this tutorial or claim it as your own. If you would like to share it, please share the link to the site this is posted on ONLY.
This tutorial is written using Adobe Photoshop CS5 and is for those with a working knowledge of Photoshop. This tutorial can be adapted for anyone with a working knowledge of PSP.

Supplies needed:
Alexis’s Graphics Palace scrap kit Magical Mischief. You can find where to buy it here.

The tube I’m using misticheskaya Juliette. You can get it here at PicsForDesign.
Remember, you cannot use any of her tubes without a license.

Mask: Design by Vabys Mask 30. You can find them here. Scroll down towards the bottom to find them.

Filter: Alien Skin Xenofex 2 – Burnt Edges

Font of choice. I used Arizona DB.

Open a canvas 600x600

Open paper 01. Create your mask using paper 3. Have it cover as much of the canvas as possible. Apply Alien Skin Xenofex 2, Burnt Edges using the default settings. Lower Opacity to 91%.

Use paper 06 to create your mask. Place it over Paper 01 to your liking.

Open your tube and place it on your canvas to your liking. Add a drop shadow.

E16 = Reduce 51.6%. Place in the lower right corner of your canvas. Add a drop shadow.

E22 = Reduce 32.6%. Place on top of E16 to your liking. Add a drop shadow.

E17 = Reduce 40.3%. Add a drop shadow and outer glow using the default settings. Place in the middle of your canvas, on the right hand side behind the tube.

E14 = Reduce 36.8%. Place towards the lower left corner of your canvas. Add a drop shadow.

E15 = Reduce 39.7%. Place in the lower left of your canvas over E14. Add a drop shadow.

E18 = Reduce 30.3%. Place on top of E15. Add a drop shadow.

E23 = Reduce 28.4%. Place on the lower left corner of your canvas. Add a drop shadow.

E08 = Reduce 33.0%. Rotate 31.0. Place over the top hat. Add a drop shadow.

E11 = Reduce 35.8%. Rotate -11.0. Open your blending options, Check Drop Shadow, Bevel and Emboss using the default settings. Check Stroke – Size 1 Color FED8D8. Place towards the top left of your canvas.

E39 = Reduce to these settings.
Width – 87.1%
Height – 89.5%
Place behind your tube to your liking.

E12 = Reduce 40.3%. Place on the left side of your canvas to your liking. Add a drop shadow.

E6 = Reduce 48.3%. Rotate -2.7. Place in the upper left hand corner of your canvas. Add a drop shadow.

E05 = Reduce 29.1%. Place under element 10. Add a drop shadow.

E04 = Reduce 28.3%. Place on the right side of your canvas to your liking. Add a drop shadow.

E24 = Flip horizontally. Reduce 46.5%. Place on the right side of your canvas to your liking. Add an outer glow.

E34 = Reduce 87.6% Place behind elements 15 & 16.

E28 = Reduce 57.0%. Rotate 62.0. Place behind your tube in the left side of your canvas behind your tube. Duplicate, flip horizontally and place in the upper right side of your canvas behind your tube.

Add your font using this setting for the color. FF0019.
Open your Blending Options.
Check Drop Shadow using the default settings.
Check Bevel & Emboss using the default settings.
Check Stroke, size 1. Color 000000.

Add your license and your watermark. Delete the white background. Save as .png and you’re good to go.


I hope you enjoyed doing this tutorial.

September 3, 2013

Slave

CT/PTU tutorial for Waggish Sparkles.


The creation of this tutorial is my own any resemblance to any other tutorial is strictly a coincidence.
Do not copy this tutorial or claim it as your own. If you would like to share it, please share the link to blog ONLY.
This tutorial was written using Adobe Photoshop CS5 and is for those with a working knowledge of Photoshop. This tutorial can be adapted for anyone with a working knowledge of PSP.

Before we start, I would like to remind you to save frequently. This is in case your program closes on you as mine is known to do. J  I save as a .psd file. This keeps your elements in layers instead of merging everything the way a .png file does. I also I do not say copy and paste your element onto your canvas. In photoshop, it is possible to drag and drop. But if you are more comfortable copying and pasting, then by all means do what is easier for you. I also use a white background while I’m making my tag but I delete it when I am finished.

Supplies needed:
Slave scrap kit by Waggish Sparkles. You can find where to buy it here.

The tube I’m using is Slave from The Hunter. You can get it here. Remember, you cannot use any tubes without a license.

Mask: Insatiable Dreams Mask #342. You can find it here. Please follow all TOU.

Font used is Passions Conflict ROB. You can use any font you want though.

Open a canvas 600x600

Create your mask using paper 11. Place on your canvas to your liking. Lower your opacity to 67%.

Open your tube, resize it to your liking then place it on your canvas. Add and outer glow and drop shadow using the default settings.

Flamed Heart = Resize to 106.1%. Place behind your tube.

Paper 7 = Place behind the Flamed Heart. Size to fit slightly bigger than the frame then erase the excess surrounding it.
Doodle 2 = Duplicate. Take the first copy and reduce 53.9%. Place on the lower right hand of your canvas.  Take your copy, flip horizontally.
Reduce to these dimensions:
Width = 41.6%
Height = 53.7%
Place on the left side of your canvas slightly towards the bottom.

Butterfly 1 = Reduce 20.0%. Rotate -21.7. Place on the left side on top of the Flaming Heart.

Spattered Heart = Reduce 18.6%. Rotate -22.0. Place under the Doodle 2 copy, next to the Flaming Heart.

Bomb = Reduce 26.6%. Place on the top left corner of your canvas. Add a drop shadow.

Doodle 1 = Duplicate. Take your copy, flip horizontally. Reduce 75.4%. Place on the left side over the spattered heart to your liking. Add a drop shadow.
Take your original element. Reduce 86.5%. Place on the lower right side of your canvas to your liking. Add a drop shadow.

Rose 3 = Reduce 32.7%. Place on the right side of your canvas. Add a drop shadow.

Grass = Reduce 37.6%. Place in the middle at the bottom of your canvas.

Eyes = Size to 104.6%. Rotate 10.9. Place on top of the Flaming Heart element, making sure it is behind your tube. I positioned the eyes to be showing on either side of the tube. Open your Blending Options and check Outer Glow. Use these settings:
Structure:
Blend Mode: Screen
Opacity: 75%
Noise: 0
Use the default color.
Elements:
Technique: Softer
Spread: 0
Size: 5

Chained Skull = Reduce using these settings:
Width = 45.9%
Height = 47.3%
Rotate = 11.8
Place below the eyes to your liking.

Butterfly 2 = Reduce 24.6%. Place on the right side of your canvas near the wings.

Handcuffs = Reduce 27.4%. Place under Rose 3. Add a drop shadow.

Mask = Reduce 25.4%. Rotate 13.0. Place near the foot of the tube or to your liking. Add a drop shadow.

Cat 1 = Reduce 49.3%. Place on the lower left corner of your canvas. Add a drop shadow and outer glow using the default settings.

Lipstick = Reduce 22.2%. Place near the cat. Add a drop shadow.

Bow 2 = Reduce 23.8%. Rotate -43.4. Place under the Bomb element. Add a drop shadow.

Rose 2 = Duplicate. Take your original copy and reduce 30.1%. Place at the bottom of your canvas. Add a drop shadow. Take your duplicate and reduce 46.5%. Place under the foot of the tube on the right side of your canvas. Add a drop shadow.

Collar = Reduce 23.4% Place it under the tubes foot. I made it look as if she’s got her foot resting on it. Add a drop shadow.

Shoe 2 = Reduce 21.1%. Place in the lower right corner of your canvas. Add a drop shadow. Duplicate and place next to the original.

Add the font. Type the name. The color settings are D40815.  Size 67 points. After you type in your name, go to your blending options.
Check Drop Shadow using these settings.
Blend Mode: Multiply
Angle: 120
Distance: 2
Spread: 0
Size: 5
Check Bevel & Emboss using your default settings.
Check Stroke size 2. Color is 390000. Place the name on the top right of your canvas.


Add your license and your watermark. Delete the white background if you used one. Save as .png and you are done.